This post may contain affiliate links, view our disclaimer for details.
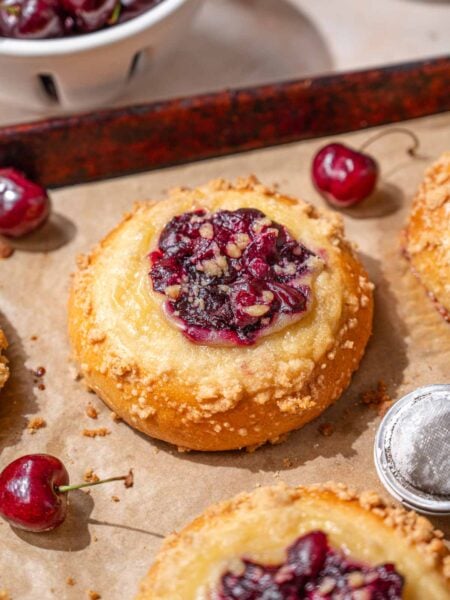
These homemade honey buns are so soft, pillowy, fried (or air fried), and topped with a sweet buttery glaze. They taste just like the store-bought version but fresher!
Just like my vegan toaster strudels, vegan moon pies, and peppermint patties, this recipe is all about recreating childhood favorites in a way that’s better than the store-bought version.

Why You’ll Love These Homemade Honey Buns
How nostalgic are honey buns!? Since I’ve been vegan I haven’t been able to eat them which is such a shame since they’re so tasty. Here are just a few of the reasons we love this recipe and you will too!
Emily’s Recipe Notes:
- Nostalgic Sweet Treat: these buns taste just like the store-bought honey buns I’d eat as a kid.
- Amazing Soft Texture: They’re so fluffy, pillowy, and sweet with subtle cinnamon undertones.
- Deep Fried or Air Fried: I’ve also included an air fryer option in the recipe card below to make these healthier than the original!
- Dairy-Free and Vegan-Friendly: This homemade honey buns recipe is made without eggs and dairy. While these honey buns are completely vegan I promise you can’t tell whatsoever! If you’re not vegan, regular ingredients can be substituted for similar results.
Why We Love These Homemade Honey Buns: I recently developed a vegan honey recipe using apple juice and chamomile. It tastes so close to regular bee’s honey that I knew I needed to create some recipes to use it in. And I thought of one of my favorite childhood treats…honey buns! And gosh, this recipe definitely delivers. They’re soft, sweet, buttery with a subtle ‘honey’ flavor. Delicious.
Main Ingredients:

Making these glazed honey buns from scratch requires just a handful of basic ingredients. You may be wondering… are honey buns vegan? Unfortunately, store-bought honey buns have bee’s honey which isn’t considered vegan friendly. But luckily, we have a delicious homemade version that tastes almost identical! Here’s what you’ll need:
- All-Purpose Flour – Essential for creating the base of the honey buns, all-purpose flour will give the buns the perfect texture.
- Active Dry Yeast – This is the leavening agent that will help the dough rise and become fluffy.
- Dairy-free Milk – In this recipe, we’re using almond milk to cater to those with dietary restrictions.
While almond milk is used in this recipe, feel free to substitute with any other dairy-free milk like soy, oat, or rice milk based on your preference.
- Sugar – Granulated sugar will help to sweeten the buns. You can use coconut sugar or brown sugar for a richer, caramel flavor.
- Ground Cinnamon & Vanilla – This spice will give the honey buns a warm, fragrant flavor. A dash of vanilla extract enhances the sweetness and adds a lovely aroma to the honey buns.
- Salted Vegan Butter – Here we’re using Earth Balance or Violife Plant Butter for its rich, creamy flavor, but any other brand of vegan butter will work just as well. If dietary restrictions aren’t an issue, regular dairy butter can be used instead of vegan butter.
- Bob’s Red Mill Egg Replacer – Equivalent to one egg, this ingredient helps bind the ingredients together and creates a tender texture.
If veganism isn’t your concern, a regular egg can replace the egg replacer. You can also substitute 1 flax egg, however, this will result in a slightly ‘breadier’ texture.
- Agave or Homemade Vegan Honey – These sweeteners add a delightful honey flavor to the buns. Maple syrup could be a good alternative if agave or homemade vegan honey isn’t available. Again, if you’re not vegan, local raw honey can be used instead.
- Powdered Sugar – For the glaze, this ingredient will create a sweet and smooth icing to drizzle over the buns.

Helpful Equipment
- Large Mixing Bowl – to make the dough
- Large Pot- for frying
- Air Fryer- if air frying
- Wire Cooling Rack– for glazing the buns
Step By Step Guide
Activate the Yeast
To make these homemade honey buns, you need to first make the dough. The first step to any yeasted dough is to activate the yeast! Yeast needs a warm liquid and sugar to ‘feed’ it and to help activate it. If you don’t activate your yeast, the dough won’t rise.

Mix the warm milk and sugar. Add the yeast. Set the yeast mixture aside for 10 minutes to activate. Once activated, it should puff/bubble up, and if it doesn’t, the yeast hasn’t been activated. If this happens, it’s likely that the yeast is dead.

Mix the dry ingredients. Once the yeast is ready, you can mix together the flour, cinnamon, and salt in a large bowl or the bowl of a stand mixer until it’s all combined.
Make the Honey Bun Dough

Add the wet ingredients. You’ll want to make a well in the center and add in the almond milk, melted vegan butter, egg replacer, vegan honey, vanilla, and the activated yeast mixture. It should come together into a soft dough. You may need to use your hands to knead the dough into a ball. The dough may also be slightly sticky. If it is, you can sprinkle 1 tablespoon of flour on it.

Knead the dough. Once the dough has come together, go ahead and transfer it to a lightly floured surface and knead it for 10 minutes. Yes, really– 10 minutes! If kneading with a dough hook attachment on your stand mixer, knead for 5-6 minutes on medium speed.
Shaping the Honey Buns

Let the dough rise. When the 10 minutes are up, grease a bowl with some cooking spray, and place the dough ball into it. Cover the dough with a warm, damp towel or plastic wrap and place it in a warm place to rise. I like to place mine in my microwave. Let the dough rise until doubled in size. This should take about 1 ½ hours.

Roll the dough. Once your dough has doubled in size, you can roll it out on a lightly floured surface into a 12” x 12” square. Spread the filling on the dough. Using a pastry brush, spread the mixture onto the rolled-out dough, making sure to leave a ½” border along the edges.

Tightly roll the dough up into a log. The tighter you can make this log the better since it will help the buns have the characteristic ‘swirls’ that honey buns have. Then, cut the log into 8 equal-sized pieces and place the buns, swirl side up, onto a baking sheet.

Press the buns down. Using your hand, gently press down to flatten them so they’re about ½” tall. Now they need to rise for a second time, so cover them with a warm, damp towel and let rise for another 30 minutes.
Cooking the Honey Buns
This recipe has instructions to either deep fry the honey buns or air fry the honey buns!
Deep Frying Instructions
- STEP 1: Fill a medium-sized pot with about 3-4 inches of vegetable oil. There should be enough oil in the pot so the buns won’t touch the bottom of the pan. I like to leave at least 3 inches of room from the oil to the top of the pot to help prevent splattering.
- STEP 2: Heat the oil on medium-low heat. This will take about 5-10 minutes. To test if the oil is hot enough, pull a tiny piece of dough off of one of the buns and drop it in the oil. When it rises to the top with tiny bubbles all around it, the oil should be hot enough.
- STEP 3: Place 1-2 buns at a time in the oil and fry each side for 2-3 minutes until golden brown. Only fry 1-2 buns at a time, otherwise, the temperature of the oil will decrease resulting in denser honey buns. If you’re finding that the buns are browning faster than 2 minutes, reduce your heat slightly.
- STEP 4: Use a spatula or a slotted spoon to remove the buns from the pot. Then, place them on a paper towel-lined cooling rack to cool. Be sure to let them cool completely before glazing. Glazing warm honey buns will result in the glaze running off the tops.
Air Frying Instructions
While the fried honey buns are delicious, this recipe is also delicious air fried! I will say, air frying these buns is also a lot easier.
- STEP 1: Preheat your air fryer to 375F. Then, place the buns on a parchment-lined air fryer basket and spray both sides of the buns generously with cooking spray. You can also brush them with melted vegan butter if you’d like.
- STEP 2: Air fry these homemade honey buns for 6-8 minutes until golden brown on top.

Serving & Glazing the Buns
To make these glazed honey buns, you’ll want to mix the glaze ingredients together in a medium-sized bowl. The mixture should be thick yet pourable and should drizzle easily off of your spoon.
The easiest way to glaze these buns is to dip the tops of them into the glaze. Hold the buns over the bowl to drizzle some of the excess glaze off, and then place them back onto a wire rack with a baking tray placed beneath it. Before you dig in, let the glaze set up a little bit!
And there you have it- homemade honey buns.
These buns are seriously just like Hostess or Little Debbie Honey Buns, but vegan! Sweet, flavored with vegan honey, and fried to perfection, these buns have a soft, pillowy interior with a slightly crispy, sticky exterior. YUM.
Storage
After your homemade honey buns have completely cooled, wrap them individually in plastic wrap to lock in the moisture.
For longer storage, place these wrapped buns in an airtight container and store them at room temperature for 2 days. If you won’t be eating them within a few days, you can refrigerate or even freeze them.
Just remember to let them thaw and reach room temperature before serving for the best taste. Proper storage means your buns stay fresh and delicious!
Helpful Tips For Amazing Honey Buns
- During the kneading process, try to avoid adding excess flour. While it might be tempting to keep adding flour to deal with a sticky dough, overdoing it will alter the flour to fat ratio. This imbalance can lead to denser, rather than soft and fluffy, honey buns. If the dough is sticky, add flour sparingly and work it in patiently.
- Patience is key when it comes to yeast dough! Allow the dough to rise until it’s doubled in size. This may take about 1 ½ hours, but this timing can vary depending on the temperature of your kitchen. This step is crucial as it impacts the final texture and flavor of the honey buns, ensuring you get that perfect, pillowy softness.
- When you’re ready to fry your honey buns, make sure the oil is at the right temperature before you begin. If the oil isn’t hot enough, instead of getting a crisp, golden exterior, your buns will absorb more oil and end up greasy. To test if the oil is hot enough, drop a tiny piece of dough into it. If it rises to the top with tiny bubbles forming around it, your oil is ready for frying.

FAQ
Traditional honey buns don’t have a sugar cinnamon filling like cinnamon rolls. These homemade honey buns are filled with a honey-butter mixture and topped with a lovely honey glaze. The dough is flavored with cinnamon and vanilla.
No, traditional honey buns that you buy at the store contain bee’s honey which isn’t vegan-friendly. This recipe includes an easy homemade vegan honey that tastes similar to bee honey. This honey bun recipe is also made without dairy and eggs making it completely vegan-friendly!
Yes! You can cook this recipe in the air fryer. It’s a great way to use less oil and still get a slightly crispy exterior. I also think air frying these buns is much easier than deep frying.
More Nostalgic Desserts


Glazed Homemade Honey Buns
Rate this RecipeIngredients
The Yeast Mixture
- 1 tbsp granulated sugar
- ¼ cup almond milk or milk of choice, 62g – warm but not hot to the touch
- 2 ¼ tsp active dry yeast
Other Dough Ingredients
- 2 ½ cups all-purpose flour, 300g
- 1 tsp ground cinnamon, 3g
- 1 pinch table salt
- ¼ cup almond milk or milk of choice, 62g
- 4 tbsp salted vegan butter, 60g – melted (or butter of choice)
- 2 tsp vanilla extract, 10g
- 1 tbsp Bob’s Red Mill Egg Replacer, mixed with 3 tbsp water (equivalent to 1 egg)
- ¼ cup agave nectar, or vegan honey
Filling
- 2 tbsp salted vegan butter or butter of choice
- 2 tbsp agave nectar, or vegan honey
Glaze
- 1 ½ cups powdered sugar
- 1 tbsp salted vegan butter or butter of choice
- 2 tbsp agave nectar, or vegan honey
- 1 tsp vanilla extract
- 2-3 tbsp almond milk or milk of choice
Cooking
- Vegetable oil, for frying
- Cooking spray, for air frying
Instructions
- Prep the Yeast: Dissolve sugar in warm almond milk. Sprinkle in yeast, stir, and let sit for 5-10 minutes until bubbly. If not activated, refer to notes.1 tbsp granulated sugar, ¼ cup almond milk or milk of choice, 2 ¼ tsp active dry yeast
To Make the Dough:
- In a large bowl or stand mixer, combine flour, cinnamon, and salt.2 ½ cups all-purpose flour, 1 tsp ground cinnamon, 1 pinch table salt
- Make a well and add almond milk, melted vegan butter, egg replacer, vanilla, agave (or vegan honey), and yeast mixture. Stir until a soft dough forms. If sticky, sprinkle with 1 tbsp flour.2 tsp vanilla extract, ¼ cup almond milk or milk of choice, 4 tbsp salted vegan butter, 1 tbsp Bob’s Red Mill Egg Replacer, ¼ cup agave nectar
- Knead on a floured surface for 10 minutes (or 5-6 minutes with a dough hook on medium speed) until soft and smooth. Avoid adding excess flour. Grease a bowl, place dough inside, spray lightly, cover with a damp towel, and let rise in a warm place for 1 ½ hours or until doubled. See notes.
Shaping the Buns:
- After the first rise, roll out the dough on a lightly floured surface into a 12×12” square.
- Mix filling ingredients (vegan butter and agave) and brush onto dough, leaving a ½” border. Roll tightly into a log, cut into 8 pieces, and place swirl-side up on a baking sheet. Press to flatten to ½” tall. Cover with a damp towel and let rise for 30 minutes.TIP: The tighter you can make this log the better since it will help the buns have the characteristic ‘swirls’ that honey buns have.2 tbsp salted vegan butter or butter of choice, 2 tbsp agave nectar
Frying the Buns:
- To fry the buns, fill a medium-sized pot up with 3-4 inches of vegetable oil. There should be enough oil in the pot so the buns won’t touch the bottom of the pan. Leave at least 3 inches of room from the oil to the top of the pot to prevent splattering.Vegetable oil
- Heat the oil on medium-low heat until it reaches 350F. It will take about 5-10 minutes for the oil to heat up. To test if the oil is hot enough, pull a tiny piece of dough off of one of the buns and drop it in the oil. When it rises to the top with tiny bubbles all around it, the oil should be hot enough.
- Prior to frying, gently press the buns down a second time to flatten them into an oval shape.
- Gently place 1-2 buns at a time in the oil and fry each side for 2-3 minutes until golden brown. If you’re finding that the buns are browning faster than 2 minutes, reduce your heat slightly.
- Use a spatula or a slotted spoon to remove the buns from the pot and place them on a paper towel-lined cooling rack to cool. Let cool completely before glazing.
Air Frying the Buns:
- To air fry instead of deep fry- preheat the air fryer to 375°F. Place buns on a parchment-lined basket, spray or brush generously with oil, and air fry for 6-8 minutes until golden.
To Glaze the Buns:
- Mix the glaze ingredients together in a medium-sized bowl. The mixture should be thick yet pourable and should drizzle easily off of your spoon.1 ½ cups powdered sugar, 1 tbsp salted vegan butter or butter of choice, 2 tbsp agave nectar, 1 tsp vanilla extract , 2-3 tbsp almond milk or milk of choice
- Dip the tops of the buns into the glaze, then place them back onto a cooling rack with tray placed beneath it. Let the glaze set up prior to eating.
Video
Recipe notes
- If your yeast doesn’t bubble up while activating it, it’s likely that it is dead. Check the expiration date of your yeast. If it hasn’t expired, it’s likely your almond milk was too hot.
- I prefer to let my dough rise in my microwave (turned off).
- These honey buns are best enjoyed the first day.
- To freeze them, place them in a single layer on a plate or tray and put them in the freezer for 5 minutes. Once the glaze has set up, remove them from the freezer and wrap them tightly with plastic wrap.
- For the best taste, I recommend using my easy homemade honey recipe.
Did You Make This?
Leave a star rating and a comment below to let others know how it turned out for you!


Want to save this recipe for later? Pin it to Pinterest!


Recipe looks good, however in your ingredients you say there’s honey in the dough itself, but make no mention of where to add it in the method from what I can see, unless I’m missing something.
Yes! I too noticed that but just added it to the dough with everything else.
In the written directions there’s no mention of the agave in the dough.
Hi Katrina!
Thank you for pointing that out- I’ve updated the written instructions 🙂
Has anyone tried this using a flax egg?
Would it work?
Hi Gemma, I’ve made this recipe with a flax egg before and it does work. However, the texture of the ‘honey’ bun is breadier and less tender/doughy than if using Bob’s Red Mill Egg Replacer.
Hi there! I really want to make these but wonder if yang Trader Joes Oat Milk is okay instead of almond milk? Has anyone tried this?
*if using Trader Joes Oat Milk*
Hi Hannah! Oat Milk should work just fine! In fact, it will probably make the dough even softer/richer!
Can you bake this?
Hi Melanie, while it’s possible to bake these honey buns, I have only tested them using a deep fryer and an air fryer. Based on my experience with other donut recipes, I think that the texture of the baked version may differ quite a bit from store-bought honey buns. But you could try baking at 375F for 10-15 minutes (flipping halfway). Again, I haven’t tested this method and am approximating the time and temp. However, you’re welcome to experiment with baking them and let me know how they turn out!