This post may contain affiliate links, view our disclaimer for details.
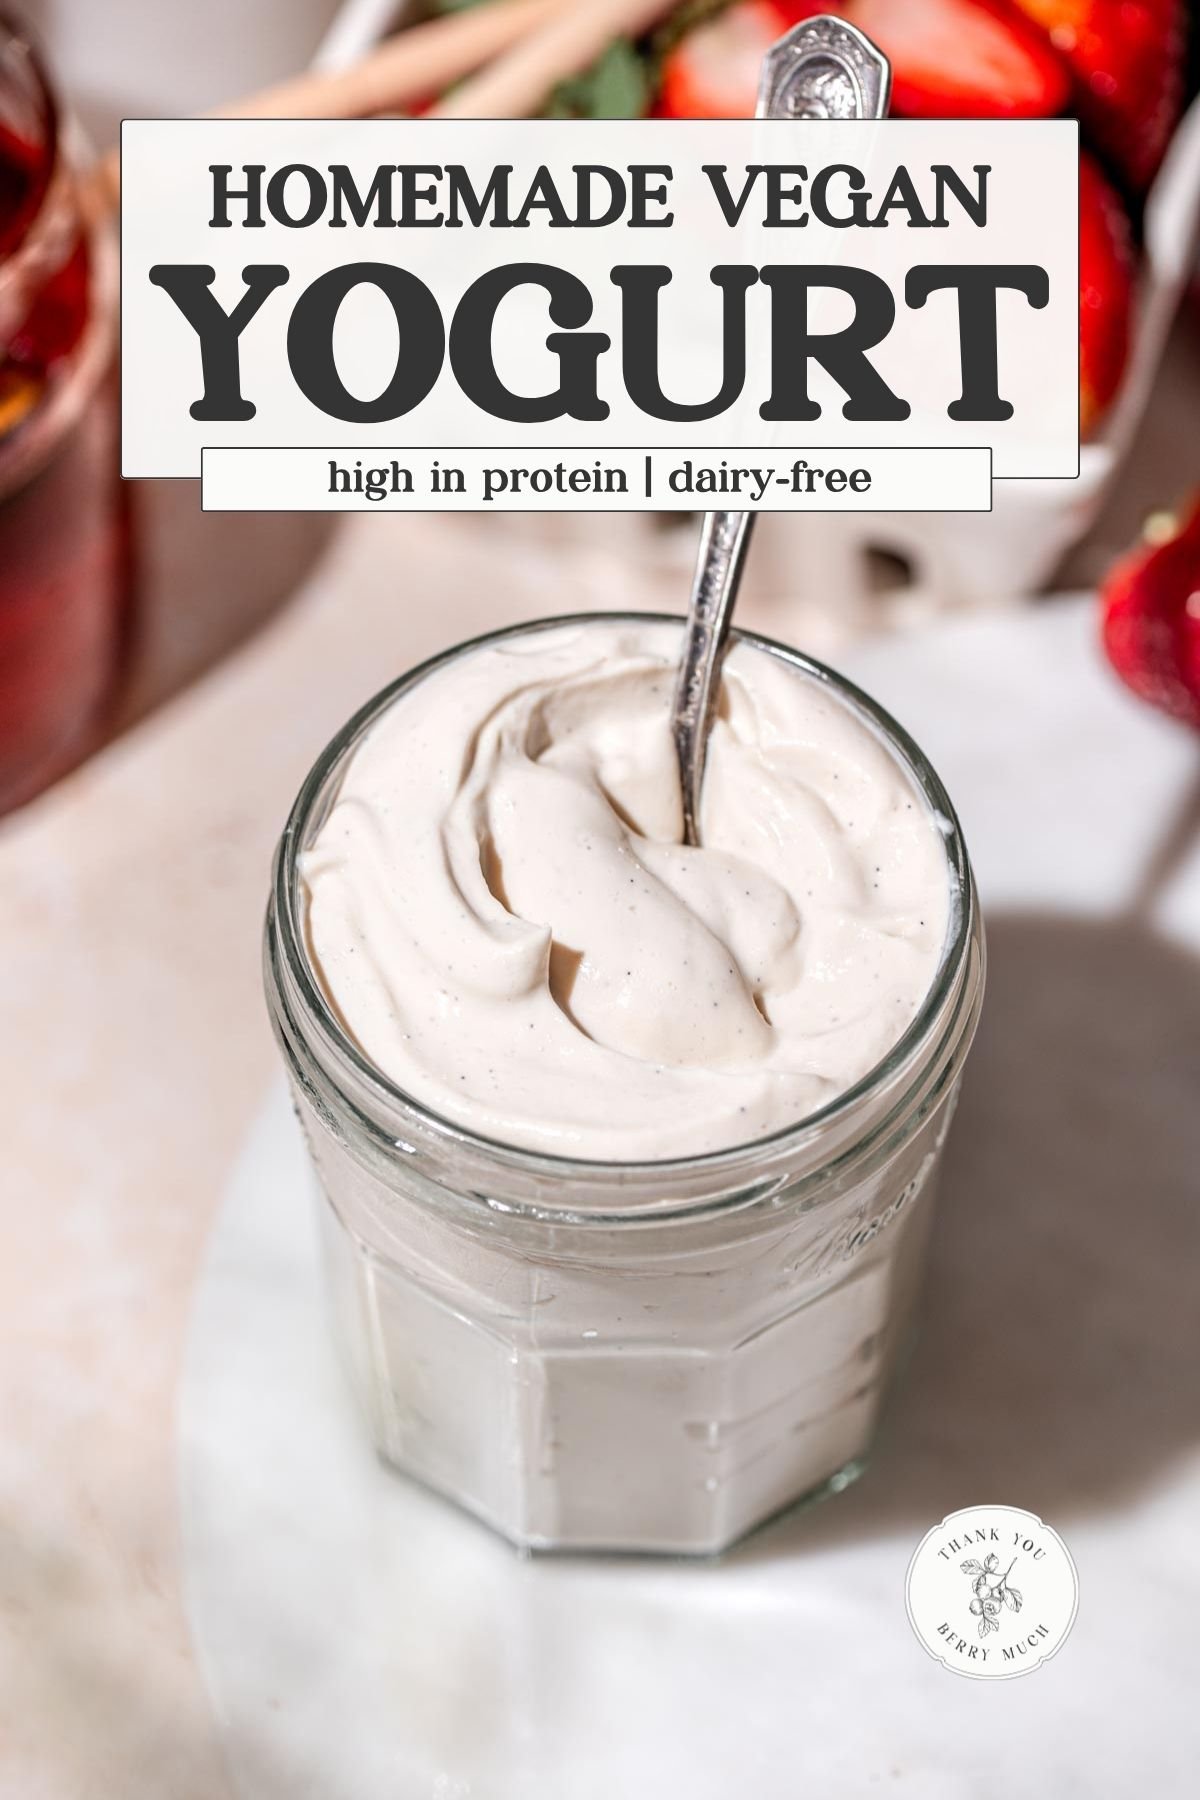
This high protein, homemade vegan yogurt recipe is easy, affordable, and can be made without a yogurt maker or Instant Pot. It has the perfect tang, a creamy texture, and around 16 grams of protein per serving, which puts it right up there with many dairy-based options.
Finding a truly high protein vegan yogurt at the store can be surprisingly difficult. Most plant-based options are either packed with added sugar, low in protein, or way too expensive for daily use…often $2–3 for a small container. Even as more brands have started adding protein to their formulas, it’s still rare to find one that actually tastes good and feels nutritionally balanced. But this recipe changes that!
Why You’ll Love This High Protein Vegan Yogurt
This recipe is super versatile because you can strain it for a Greek-style consistency, keep it looser like a classic dairy yogurt, or blend it with fruit or sweetener if you want something closer to a parfait. Plus, it’s made without coconut milk, coconut cream or coconut oil, so it’s lower in saturated fat. Here’s what makes it a staple in my kitchen:
Emily’s Recipe Notes:
- High in protein: ~16g per 150g serving.
- Budget-friendly: Each serving is roughly half the cost of an equally sized store-bought serving. So you’ll save hundreds of dollars a year if you eat yogurt almost every day like me!
- No yogurt maker required: All you need is a Dutch oven and a thermometer.
- Customizable: Leave it plain or add maple syrup, fruit purée, or vanilla.
- Beginner-friendly: This post breaks everything down step-by-step (even if it’s your first time making yogurt at home).
Why This Recipe Works
Most dairy-free yogurts are low in protein because they’re made with almond, coconut, or oat milk. None of which naturally contain much protein. This recipe uses soy milk (or a high-protein alternative like Silk’s pea protein milk) to create a thicker, more structured yogurt that holds its shape and actually keeps you full.
Soy yogurt isn’t new, but it’s become harder to find (at least where I live). And even when I can find it, most store-bought soy yogurts still didn’t match the protein content of dairy versions.
This recipe builds on what’s already out there, but with an upgrade: I’ve added pea protein to create a yogurt that’s closer in texture and nutrition to popular dairy-based brands. A scoop of pea protein brings each serving to around 16-17g of plant-based protein.
Just like with my vegan mascarpone recipe, it’s important to choose a plant-based milk with enough protein for the recipe to work properly.
Heating the soy milk to 195°F (90°C) before culturing is also important. This step helps denature the proteins so they can coagulate more effectively into a stable, smooth yogurt. This breakdown from Brod & Taylor does a great job explaining the science behind why this works.
Ingredients
Ingredient Highlights & Why They Work
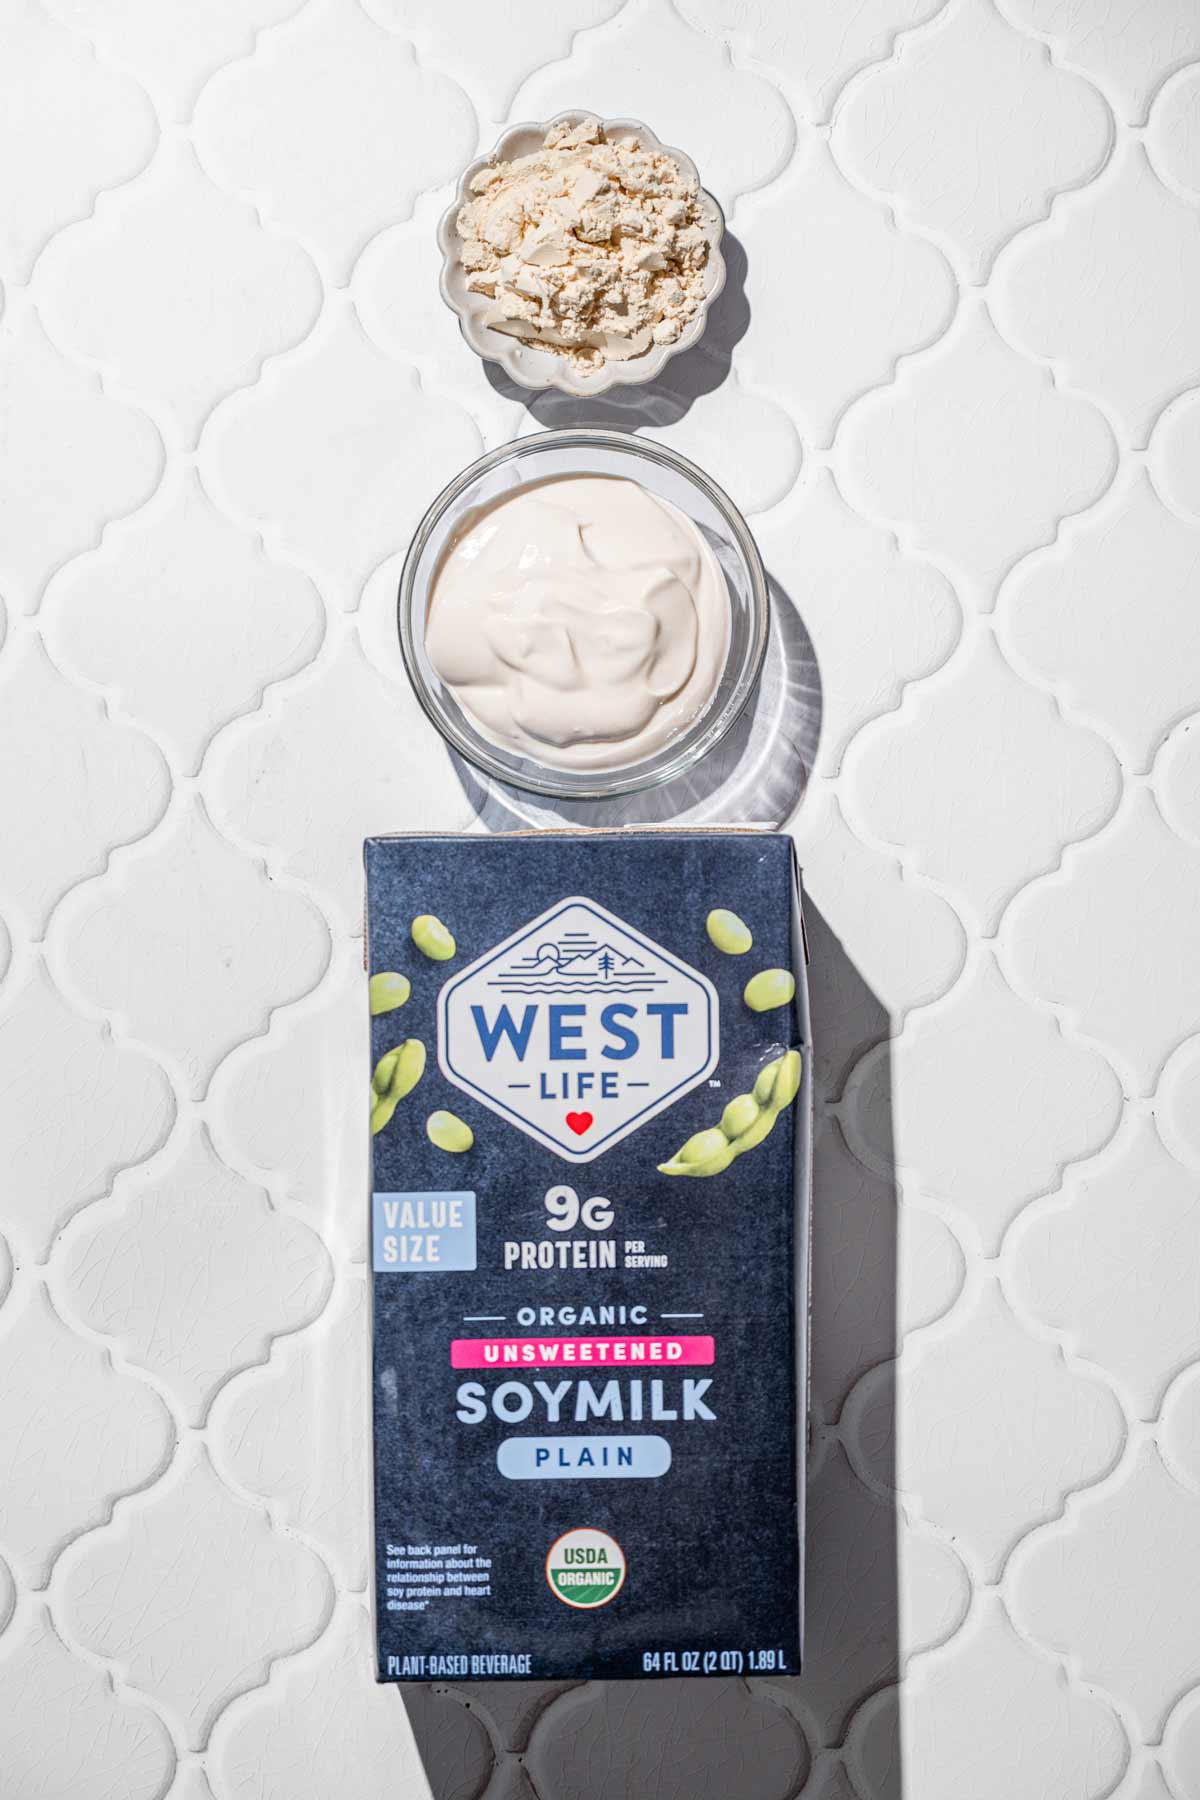
Soy Milk (or another high-protein plant milk)
Unsweetened soy milk works best here because it’s naturally high in protein and helps the yogurt set without added starches.
Like my vegan cream cheese recipe, I prefer to use West Life’s Plain Unsweetened Soy Milk, which has 9g of protein per cup and only two ingredients listed (no extra additives which could inhibit the growth of the cultures). I also tested Silk’s Kid’s Pea Protein Milk which worked, but had a slightly bitter aftertaste post-fermentation.
Pea Protein Powder
A small scoop of unflavored pea protein bumps up the total protein per serving. I use Anthony’s Goods unflavored pea protein, which is budget-friendly.
Yogurt Starter
Instead of buying a $15–$20 package of probiotic cultures or probiotic capsules, I use a few spoonfuls of store-bought plant-based yogurt as the starter. It’s way more affordable (usually around $2 for a small 5oz package) and works just as well, if not better.
Recommended Dairy-Free Yogurt Starters:
I 100% prefer using Siggi’s Plant-Based Yogurt (Mixed Berries) because it contains a wider variety of live active cultures than most other brands, giving your homemade yogurt a better chance at fermenting properly. Plus this yogurt tastes really good. You can use other flavors from this brand too (they have plain, vanilla etc.).
One 5oz carton of this yogurt makes roughly two batches, so it only costs ~$1 per 4 cup batch.
I also tested Silk’s Greek Style Coconut Yogurt (Vanilla Flavor). It also thickened within the 4-6 hour time frame. At this time, these two are the only brands I can recommend as a starter.
Other Starters Tested:
I also tested Silk’s Almond Milk Yogurt and So Delicious Coconut Yogurt. Both remained very thin (milk consistency) even after 8-9 hours of culturing (they most likely take 15+ hours). Siggi’s Plant Based thickened after 3-4 hours. Big difference!
But what about probiotics or culture packets? Well, I also tested Cultures for Health’s Vegan Yogurt Starter and it took over 15 hours to thicken into a VERY loose yogurt consistency. It smelled like yogurt but the amount of time it took to set up had me bit uneasy about food safety and the potential introduction of harmful bacteria. To learn more about whether your yogurt is safe to eat, this article breaks it down.
Optional Add-Ins (After Fermenting)
Once the yogurt has fermented and chilled, you can customize it however you like. Here are a few of my go-to mix-ins:
- Vanilla bean paste or extract
- Maple syrup, agave, cane sugar, stevia or other sweeteners
- Fresh fruit, compote, or jam
- Nut butter like cashew butter or macadamia nut butter
Just be sure to wait until after fermentation is complete before adding anything sweet or acidic, that way it won’t interfere with the culturing process or promote the growth of harmful bacteria.
Helpful Equipment
- Heavy Bottomed 5qt Dutch Oven
- Digital Thermometer: I’ve linked the one I use.
- Oven Thermometer: optional but recommended
- pH Reader: totally optional, great if you’re curious or want to be extra safe
How to Make Homemade Vegan Yogurt
Prep the Dairy-free Milk
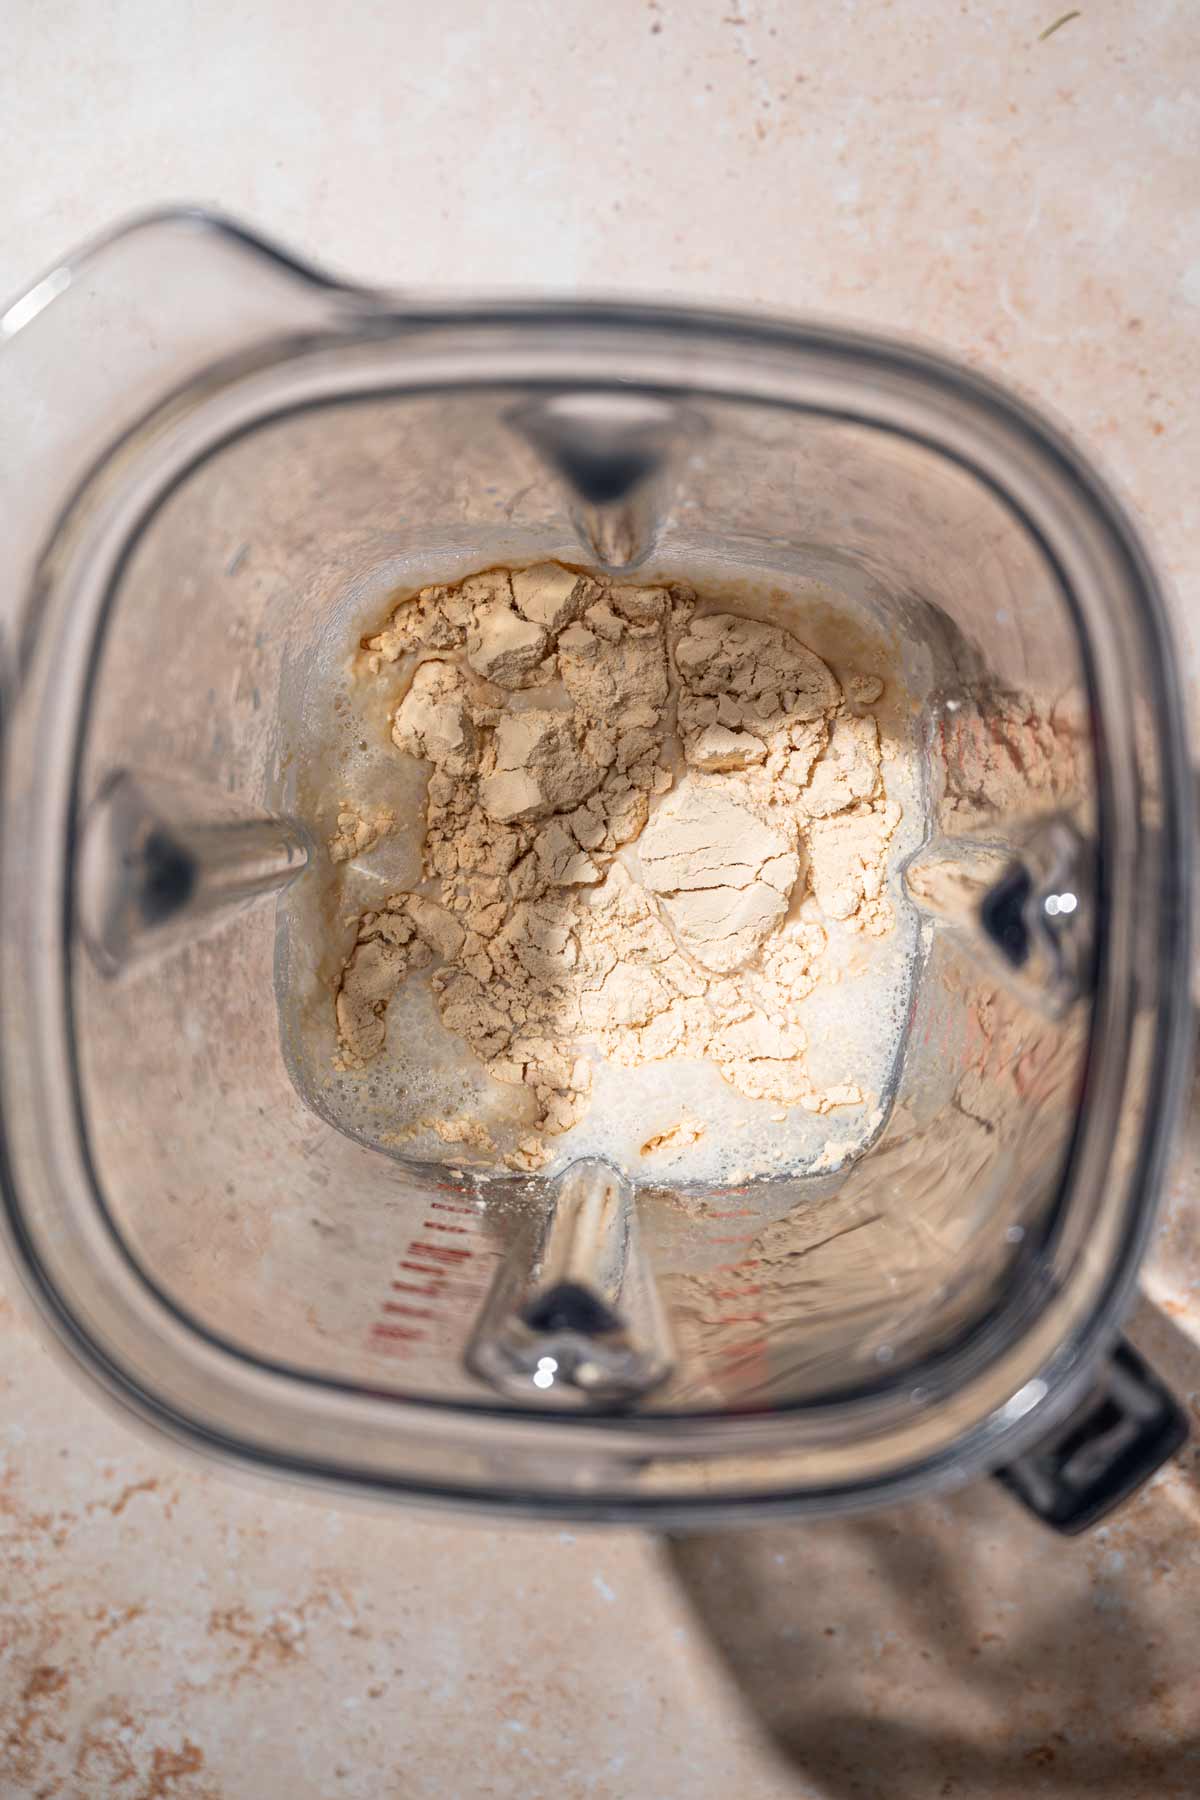
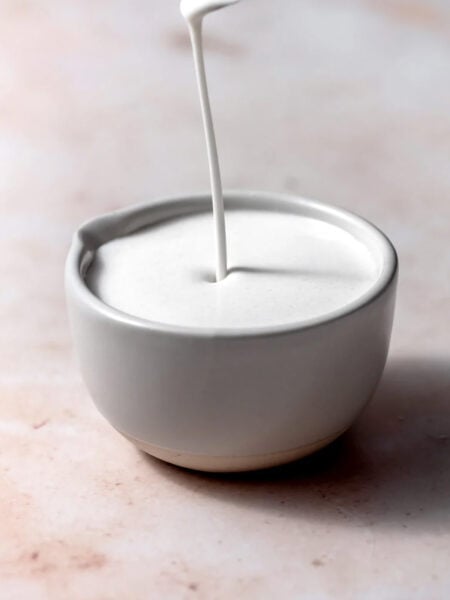
Blend or whisk 1 cup of the soy milk with the pea protein. Let the pea protein hydrate in the milk for 5-10 minutes, then whisk again.
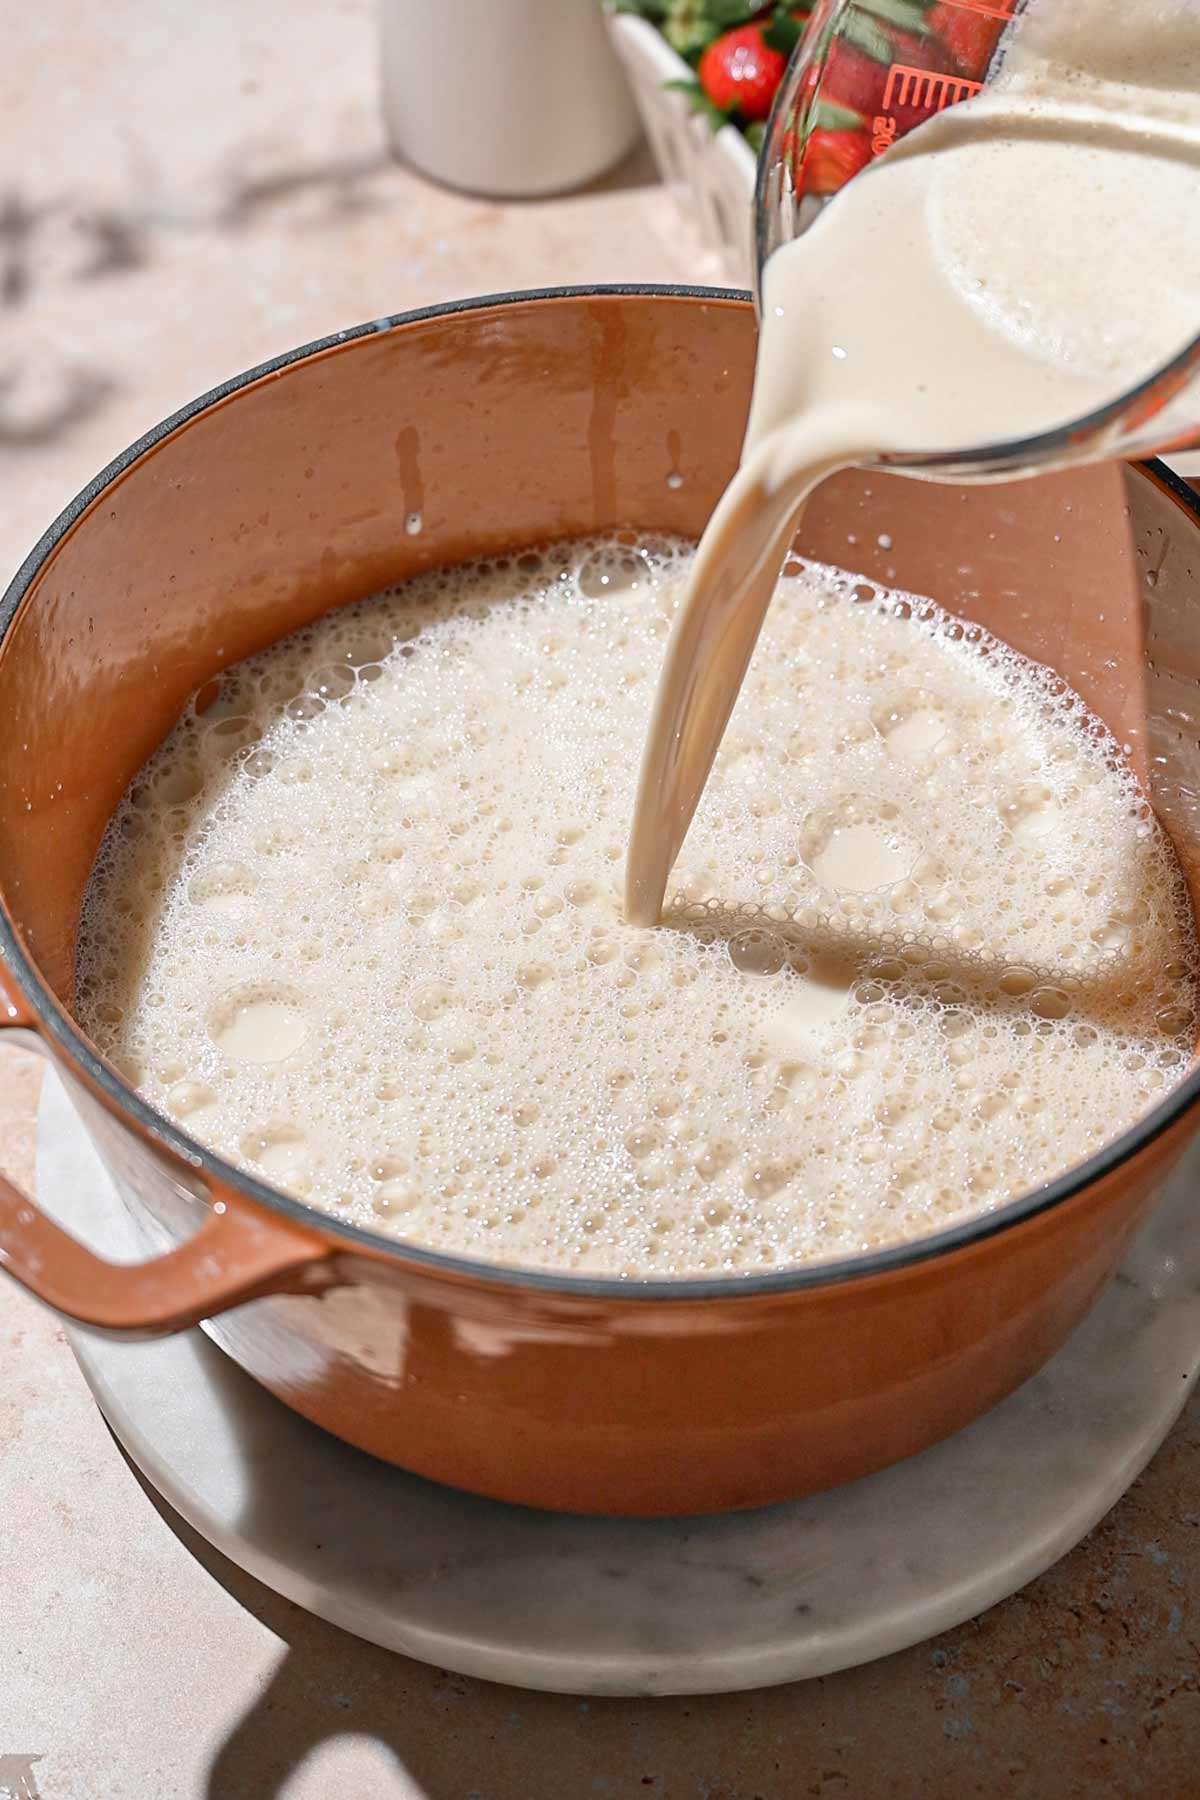
Add to a 5 qt Dutch oven with the remaining 3 cups of soy milk.

Set the pot over medium-low heat and bring the mixture to 180-195°F. Try not to boil the milk.
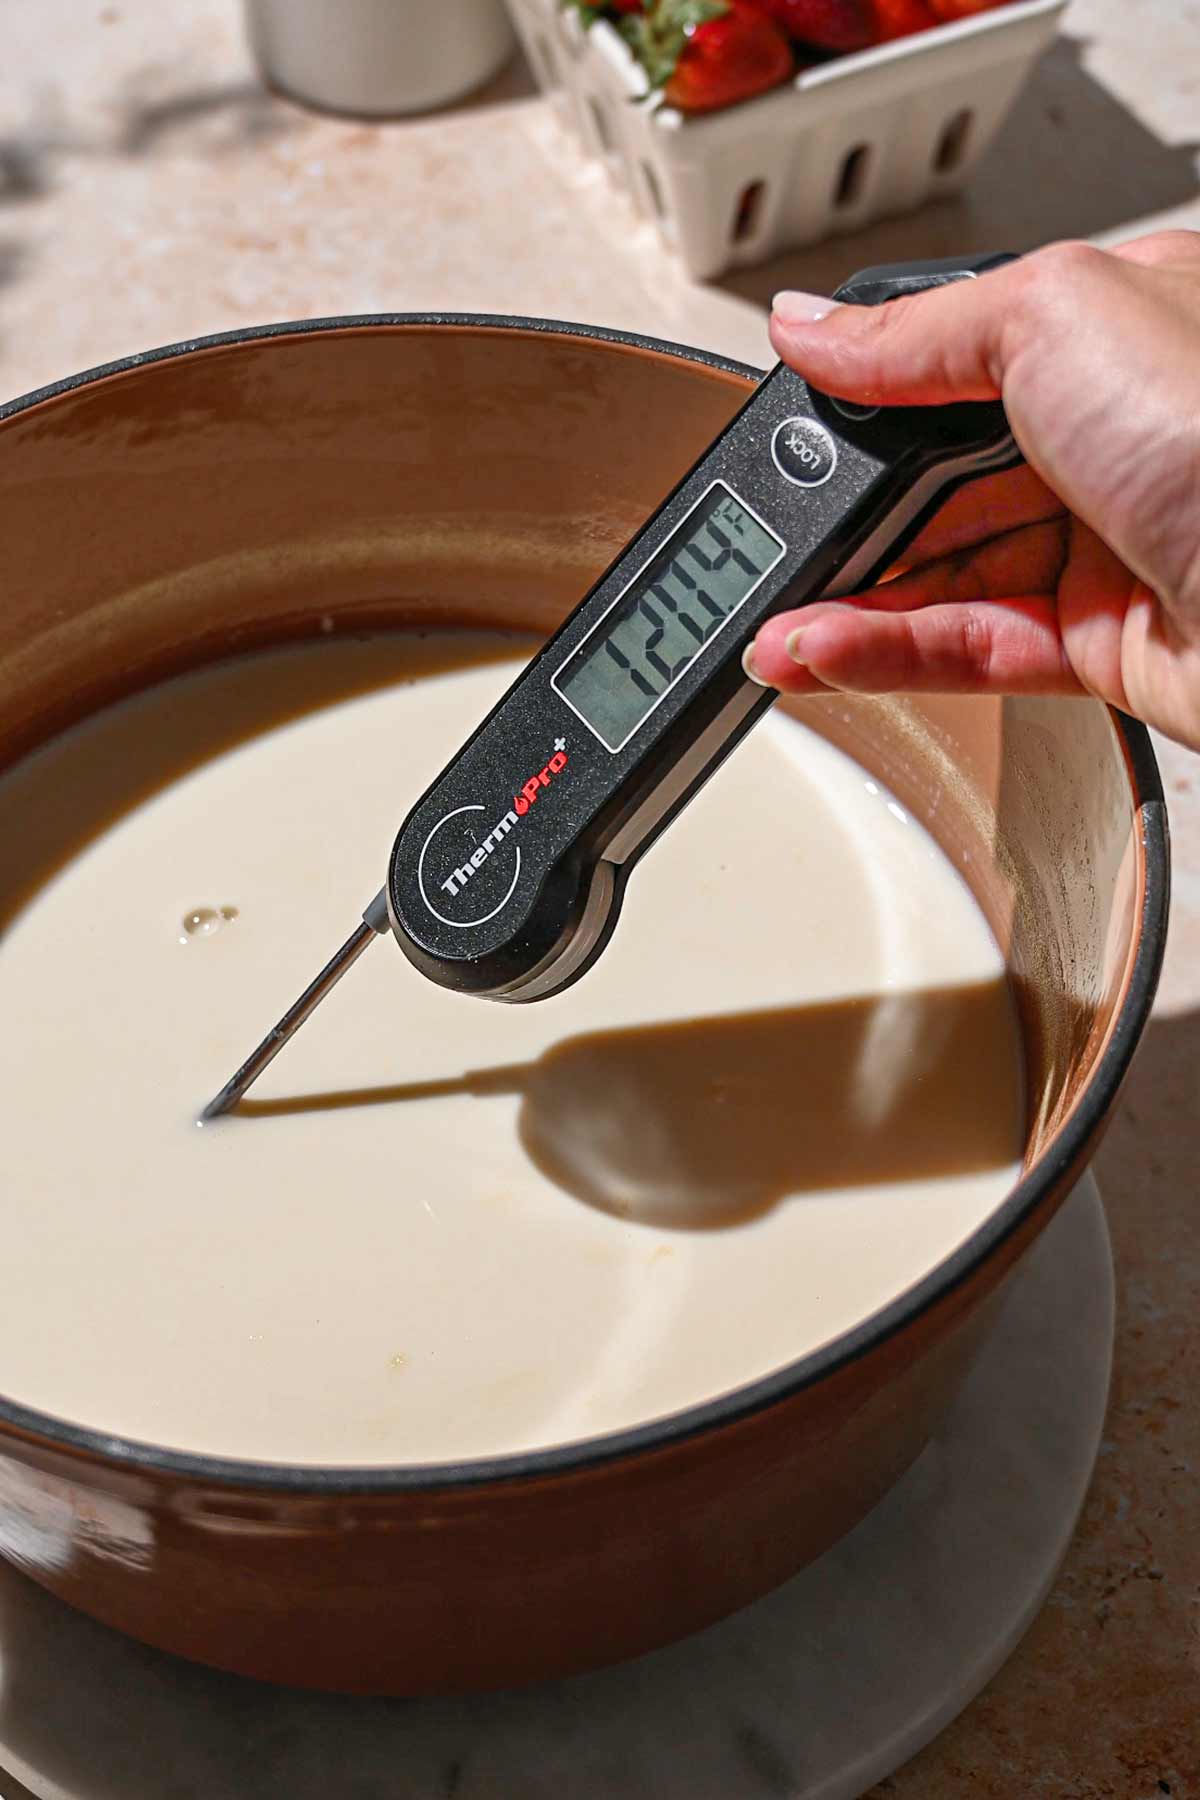
Remove the pot from the heat and let the mixture cool to ~120°F. If a skin forms, remove it and discard.
Warm the Oven + Add the Vegan Yogurt Starter
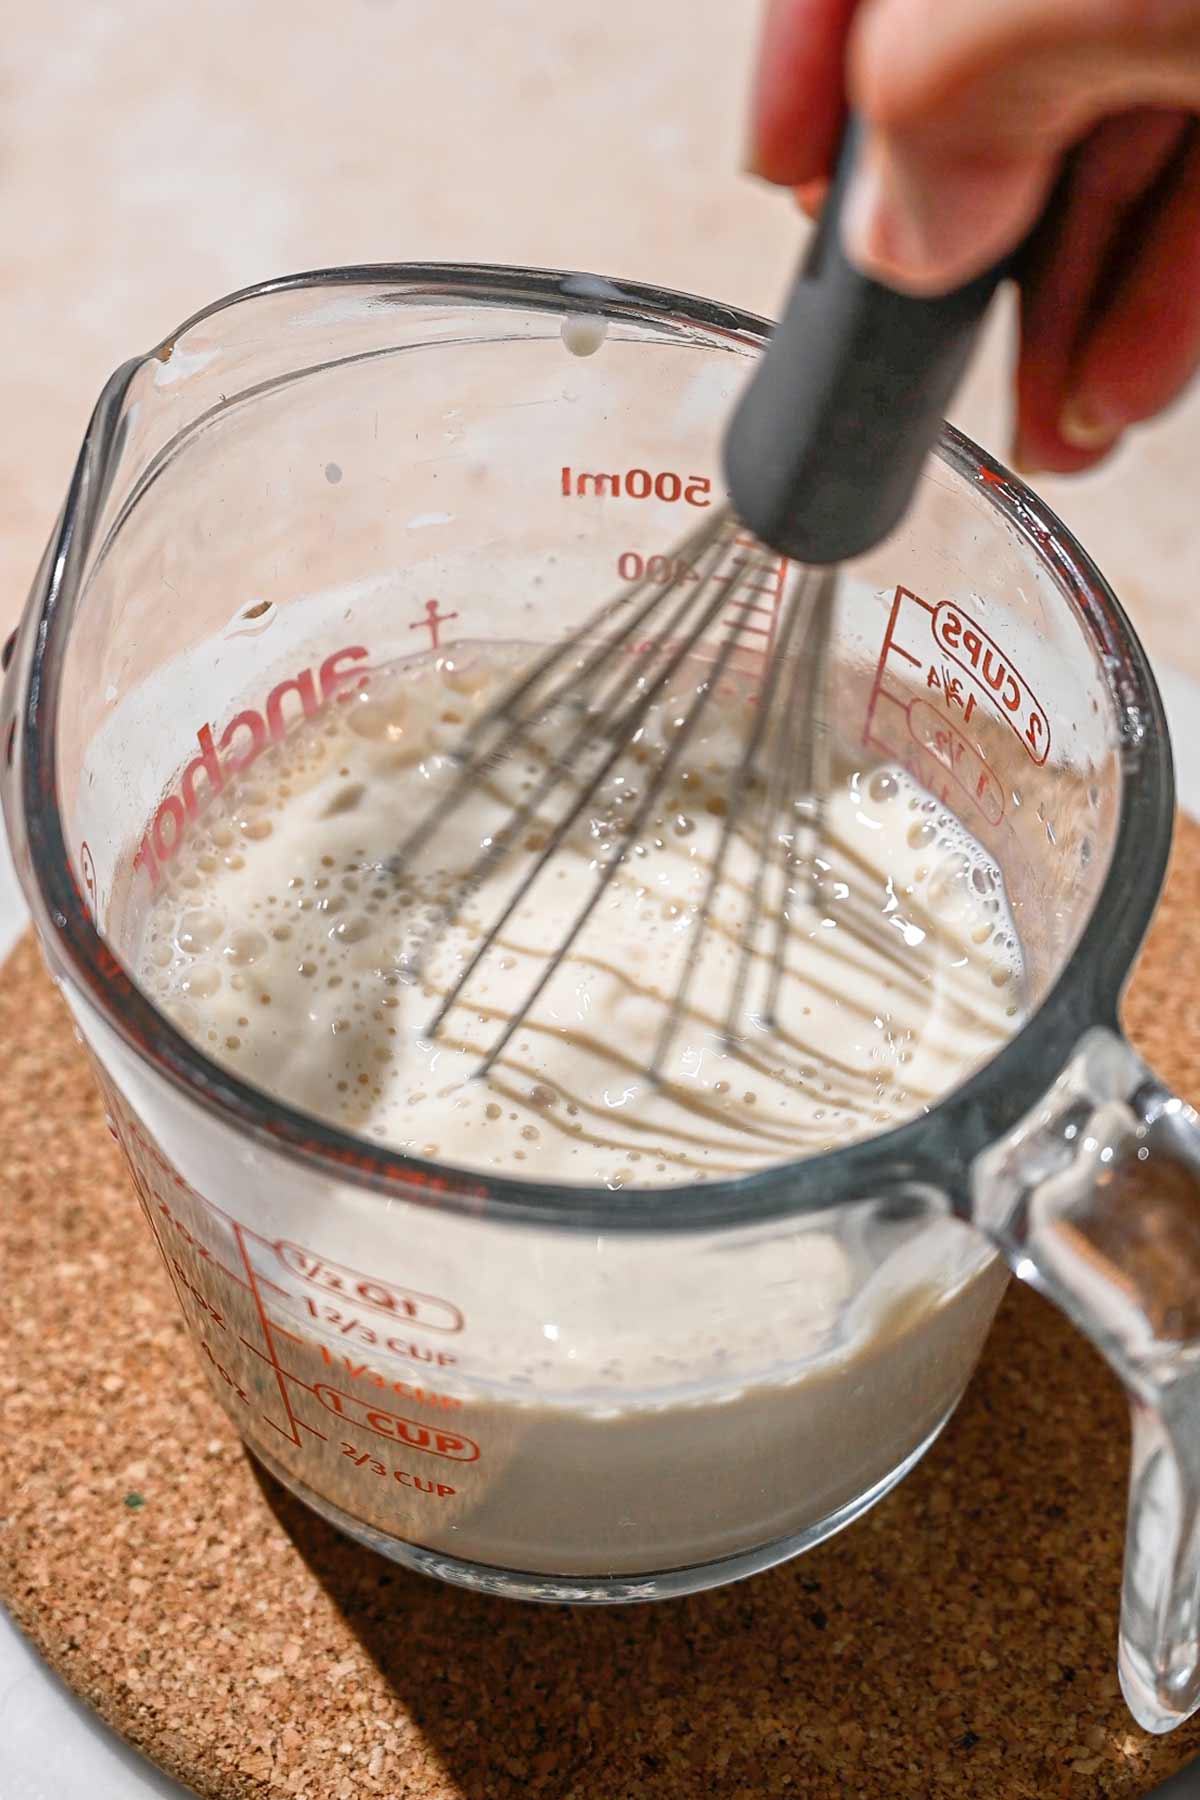
Whisk about 1 cup of the cooled soy milk mixture with ~1/4 cup of the yogurt starter (store-bought Siggi’s Plant Based Yogurt).
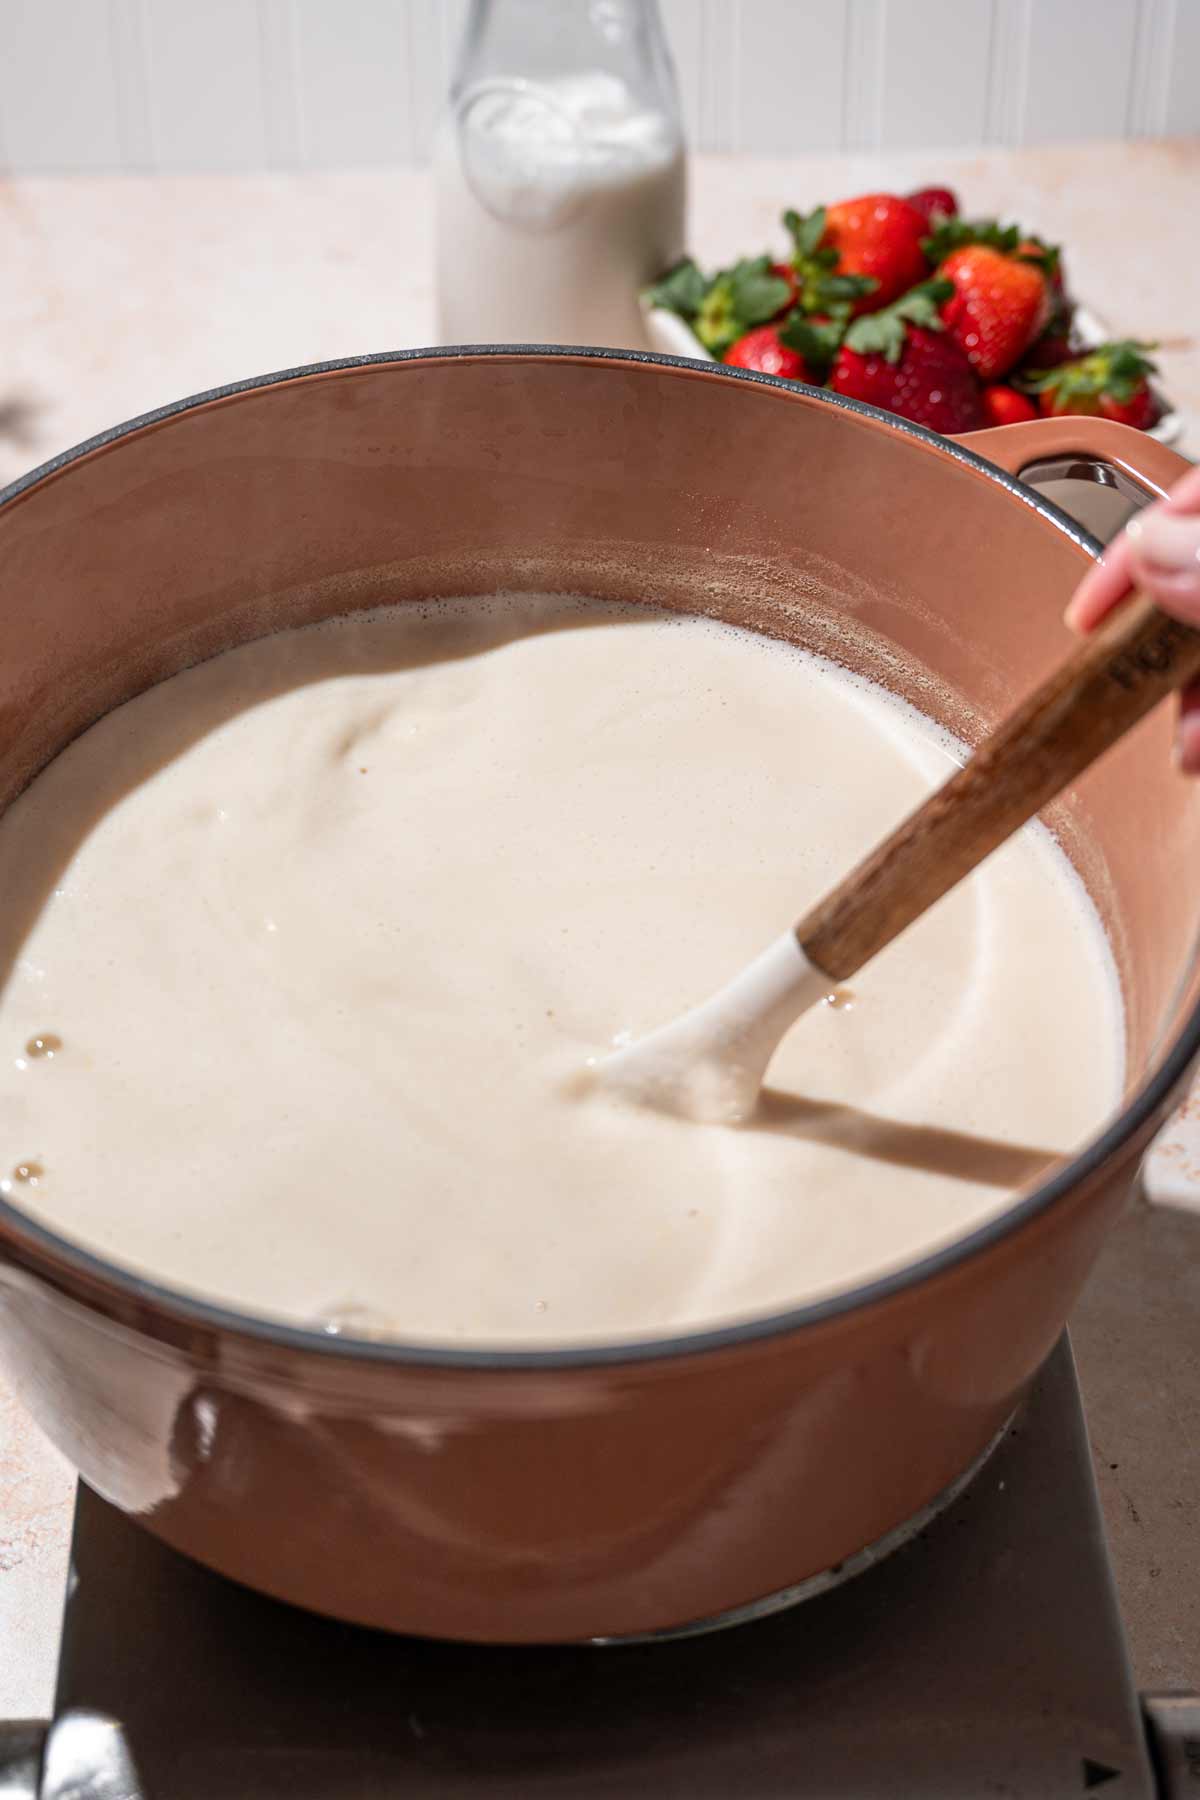
Add the starter mixture to the remaining cooled milk and mix to combine. The soy milk should be around 115-120°F at this point.
Place in the Oven to Culture
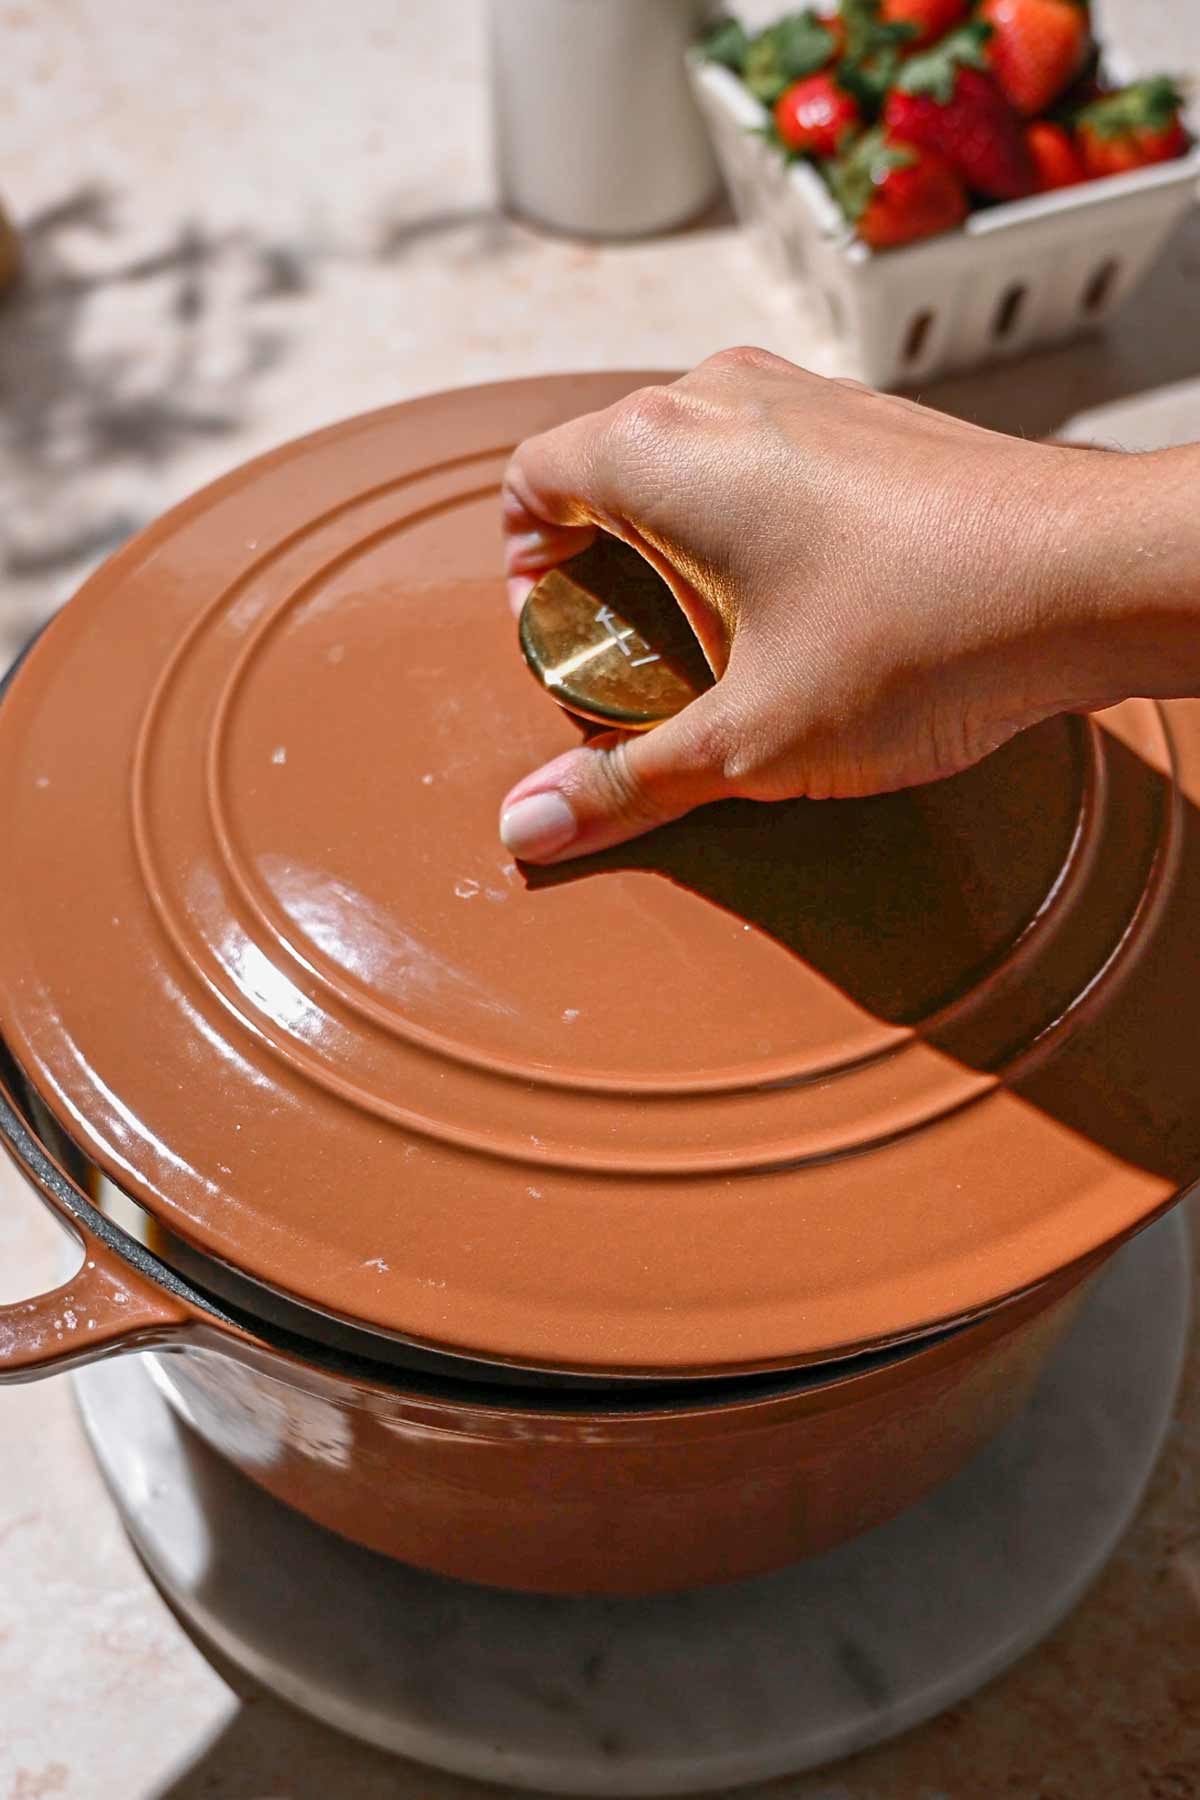
Cover the Dutch oven with the lid.
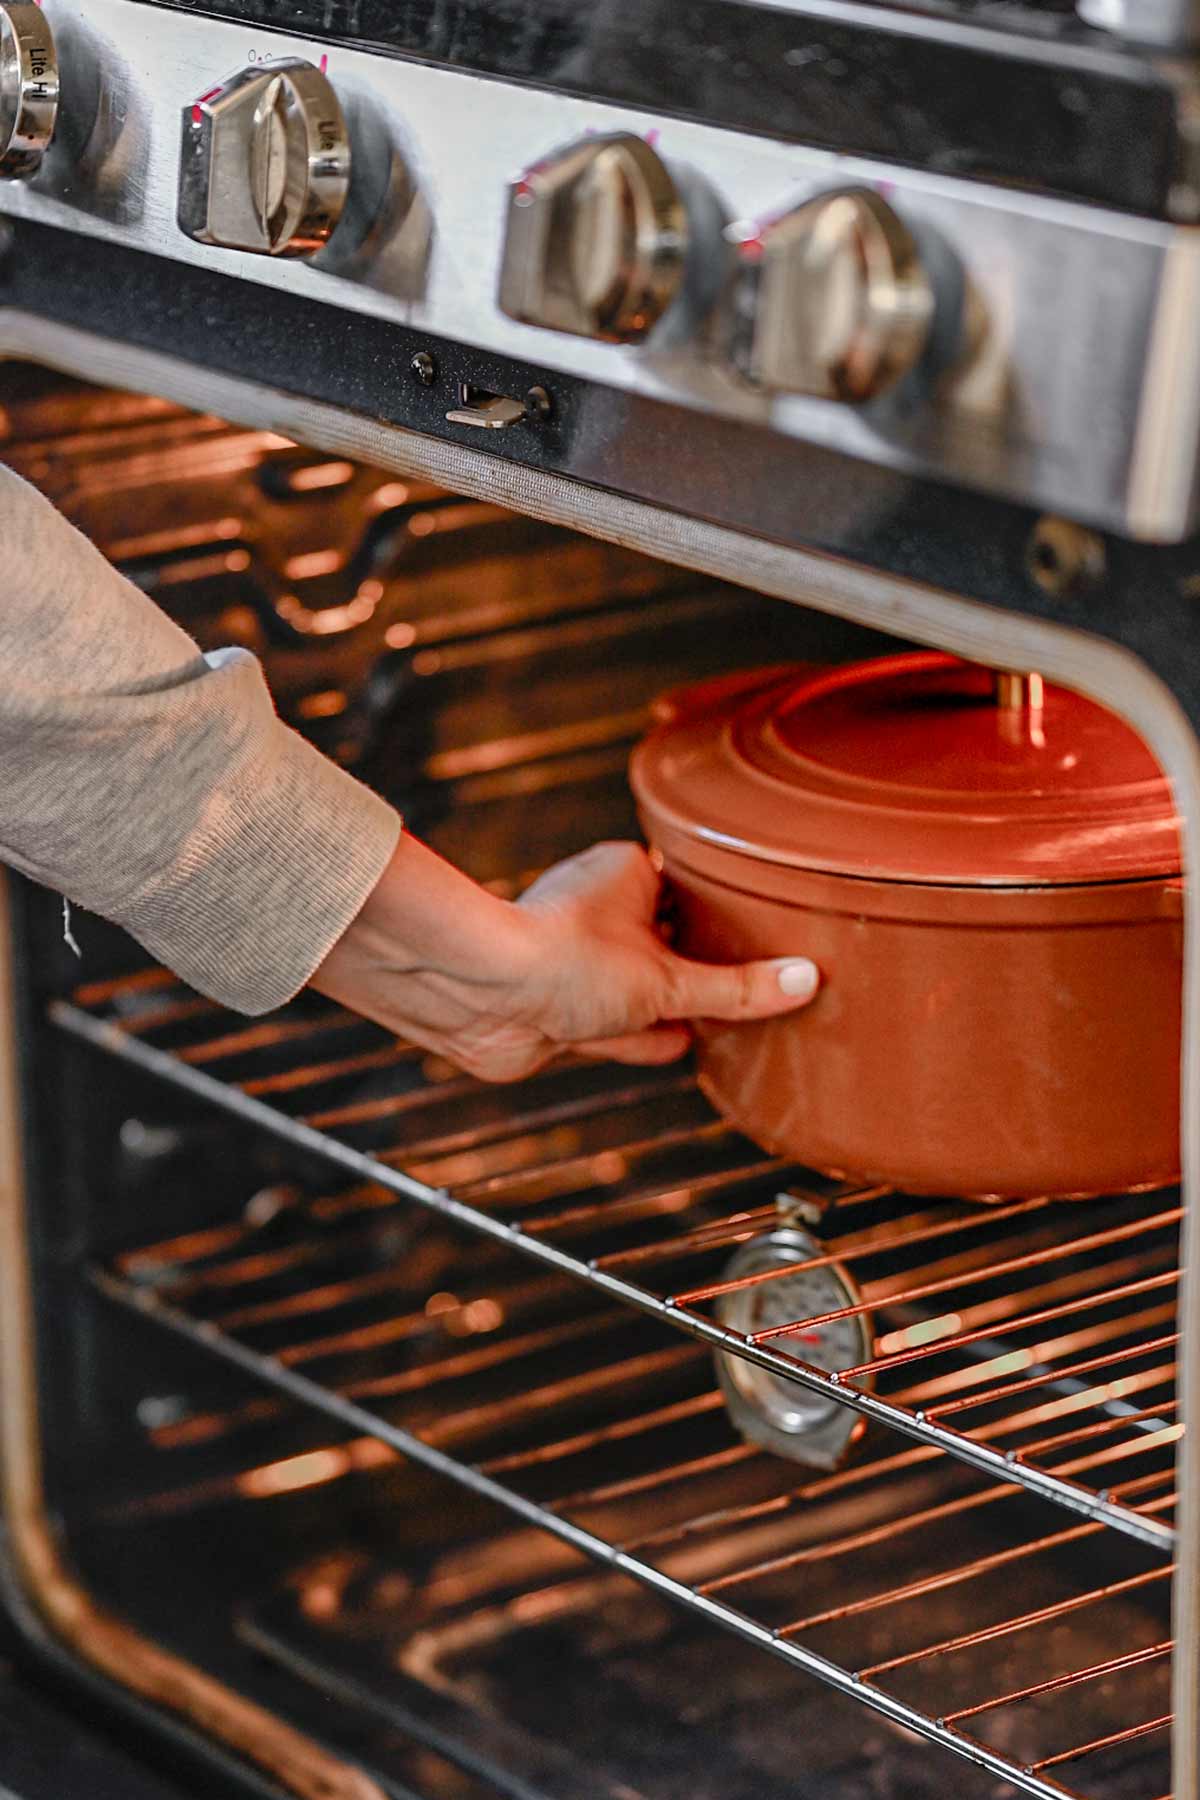
Place the Dutch oven in the warm oven. Make sure the keep warm function is turned off at this point. Close the door and turn on the oven light.
Ferment, Check the Consistency & Strain
Then, let the mixture ferment/culture for about 4 hours. I like to check the mixture and the temperature every hour or so. For the first hour the soy milk should be between 115-120°F. After the first hour, the soy milk should stay between 108-115°F.
Mine usually takes 4-6 hours for a 4-cup batch. For a tangier taste or a thicker texture, it can be fermented for up to 8 hours.
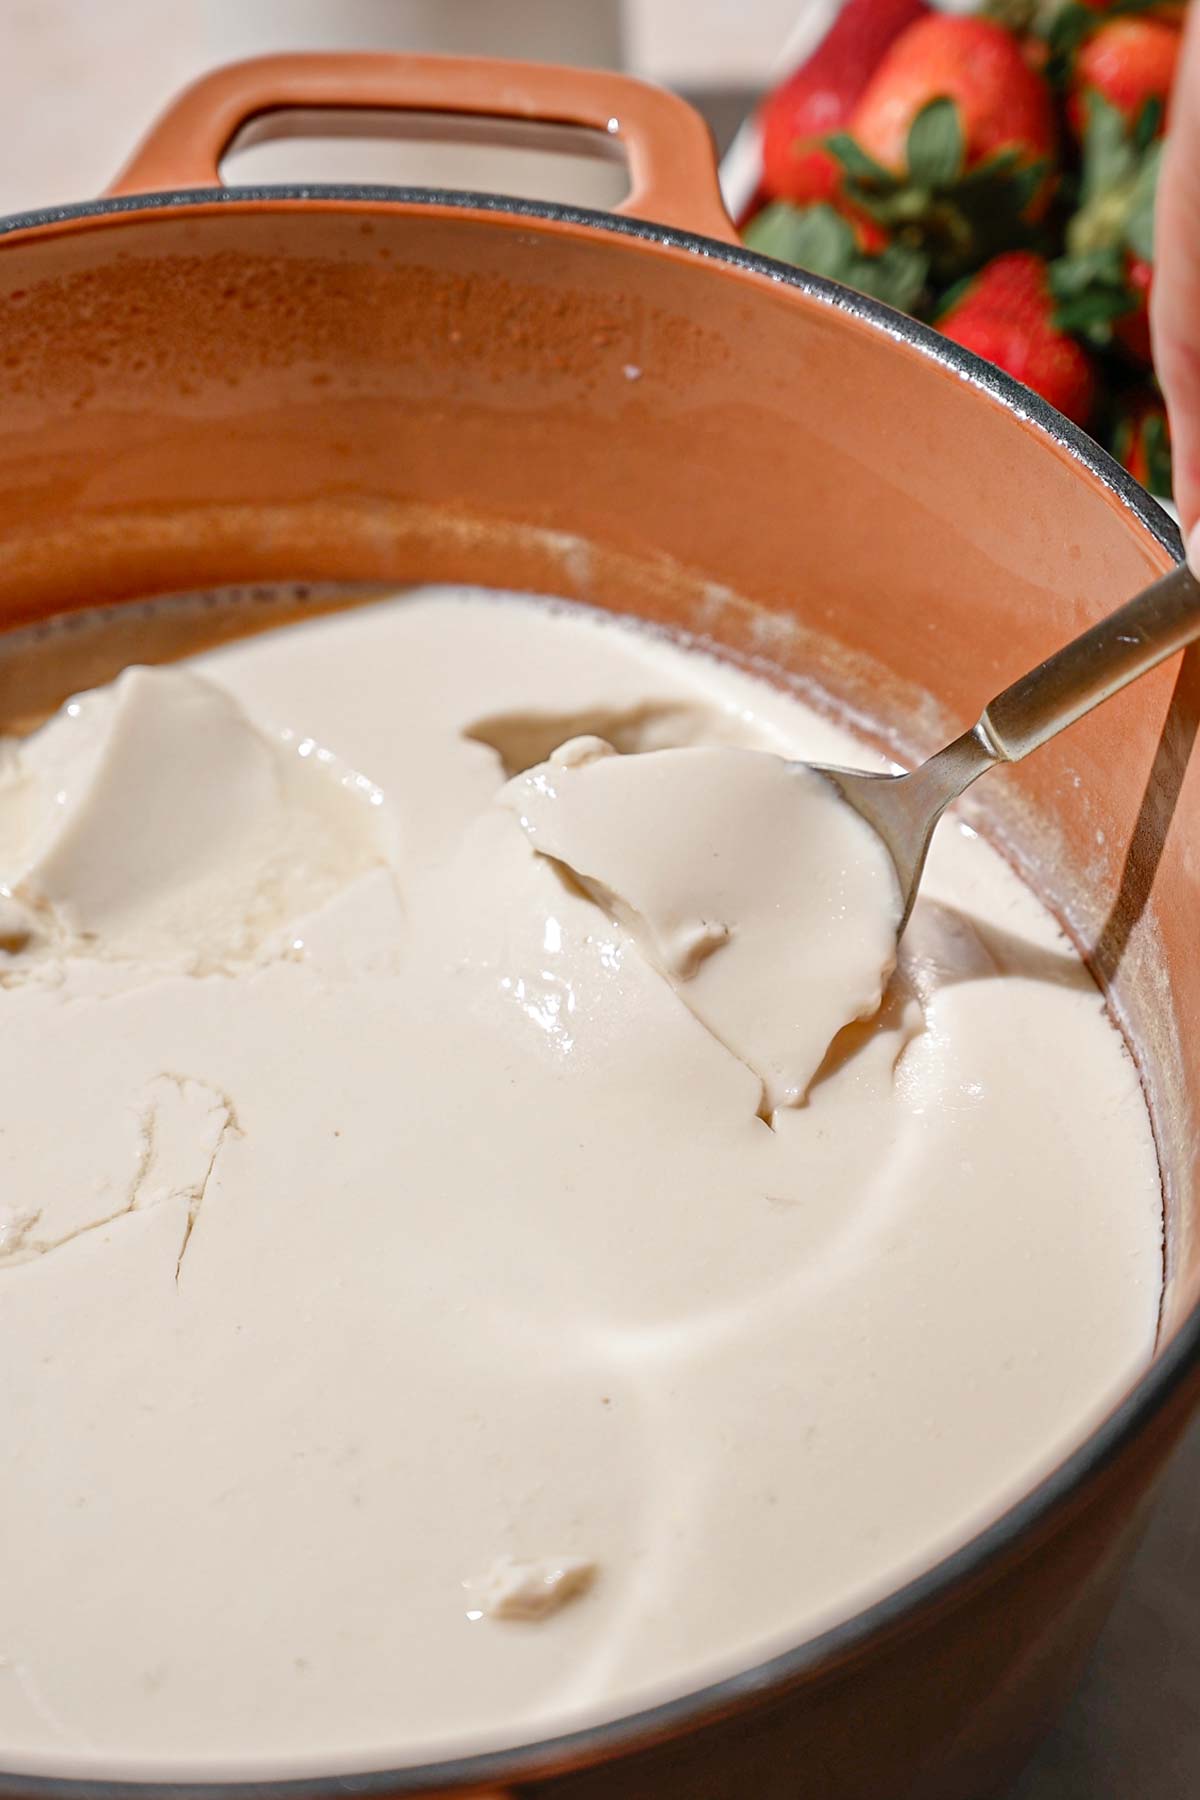
Let the milk ferment in the oven for 4-6 hours. If needed, turn the keep warm function on after every hour that passes (and then turn off after 3-5 mins) to keep the oven cavity around 110-115°F.
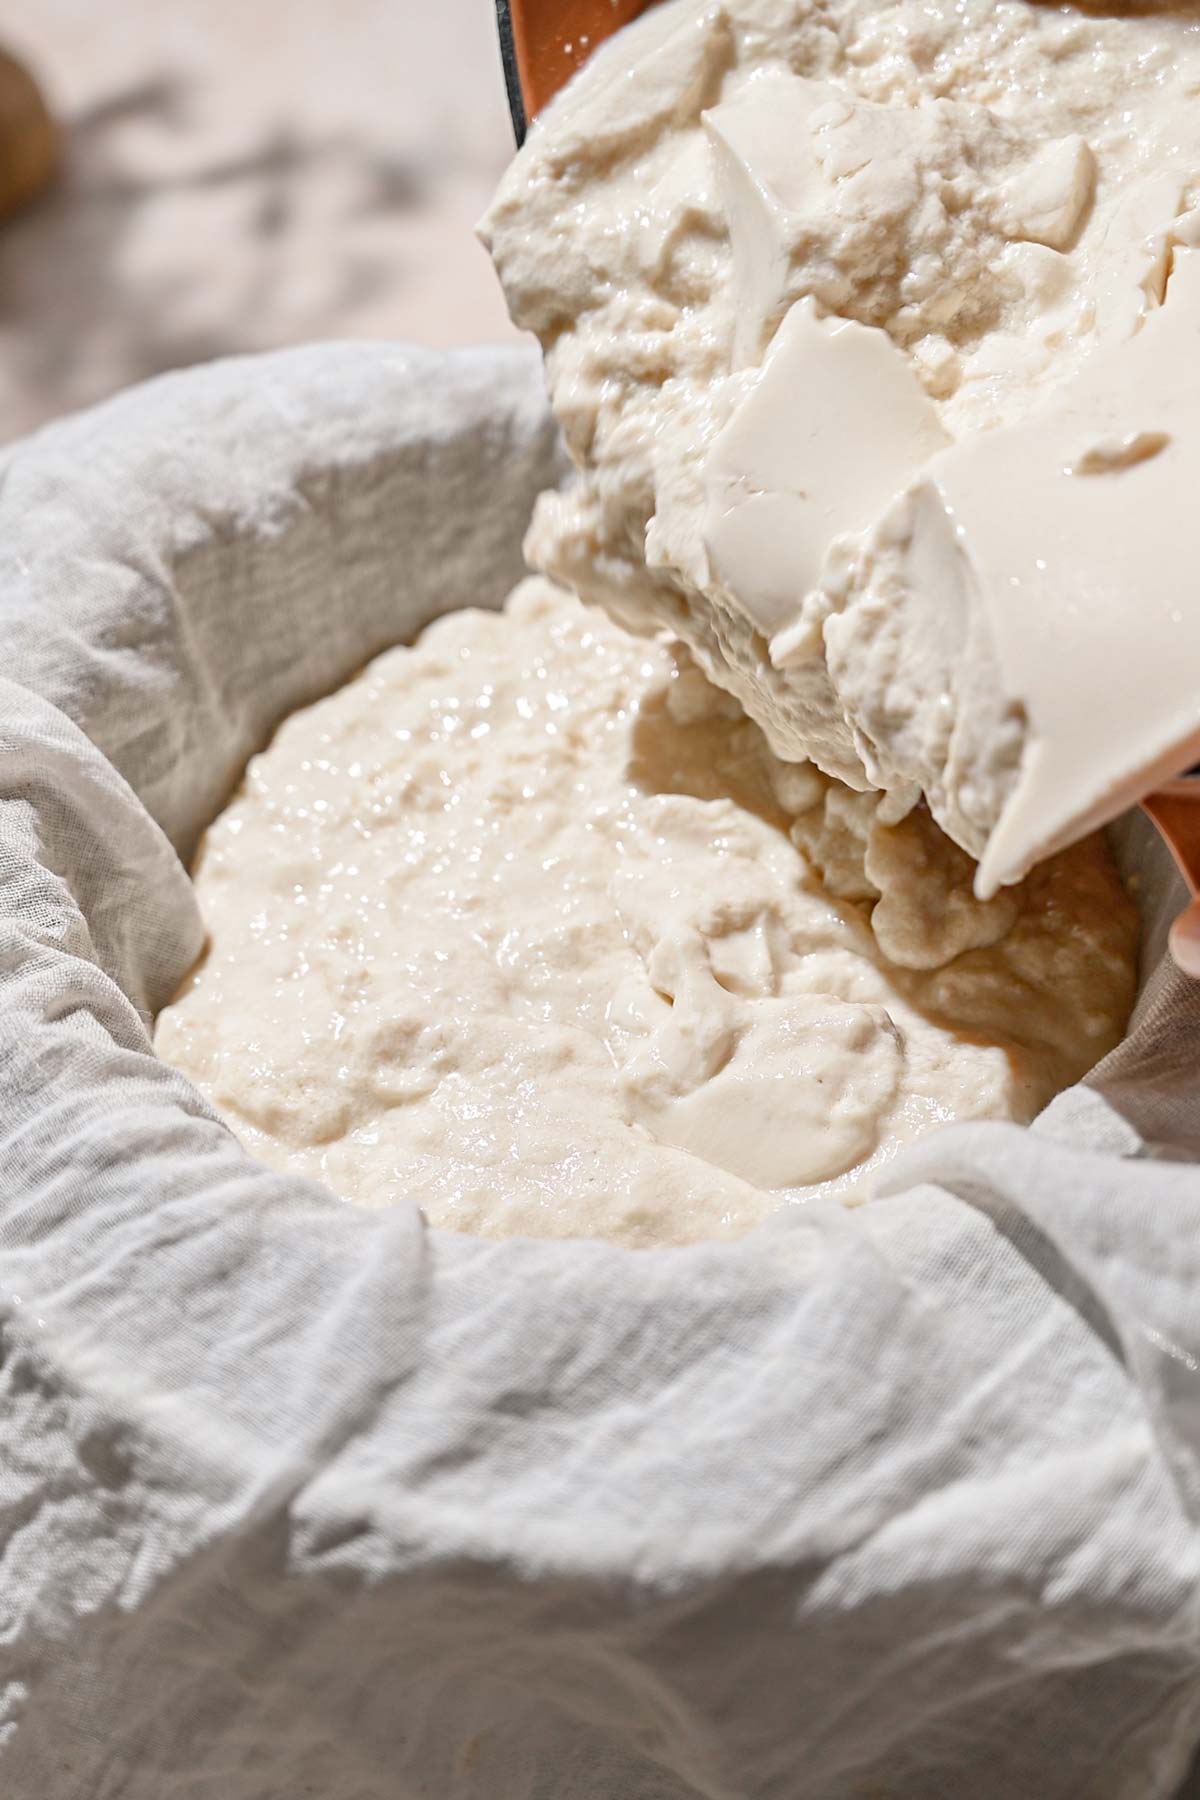
Optional for thicker greek-style yogurt: strain the soy yogurt with a cheesecloth lined sieve over a large bowl. Immediately transfer to the fridge.

Chill in the fridge and strain for at least 30 minutes or overnight. The longer it’s strained, the thicker the yogurt will be.
After straining the texture should be nice and thick!
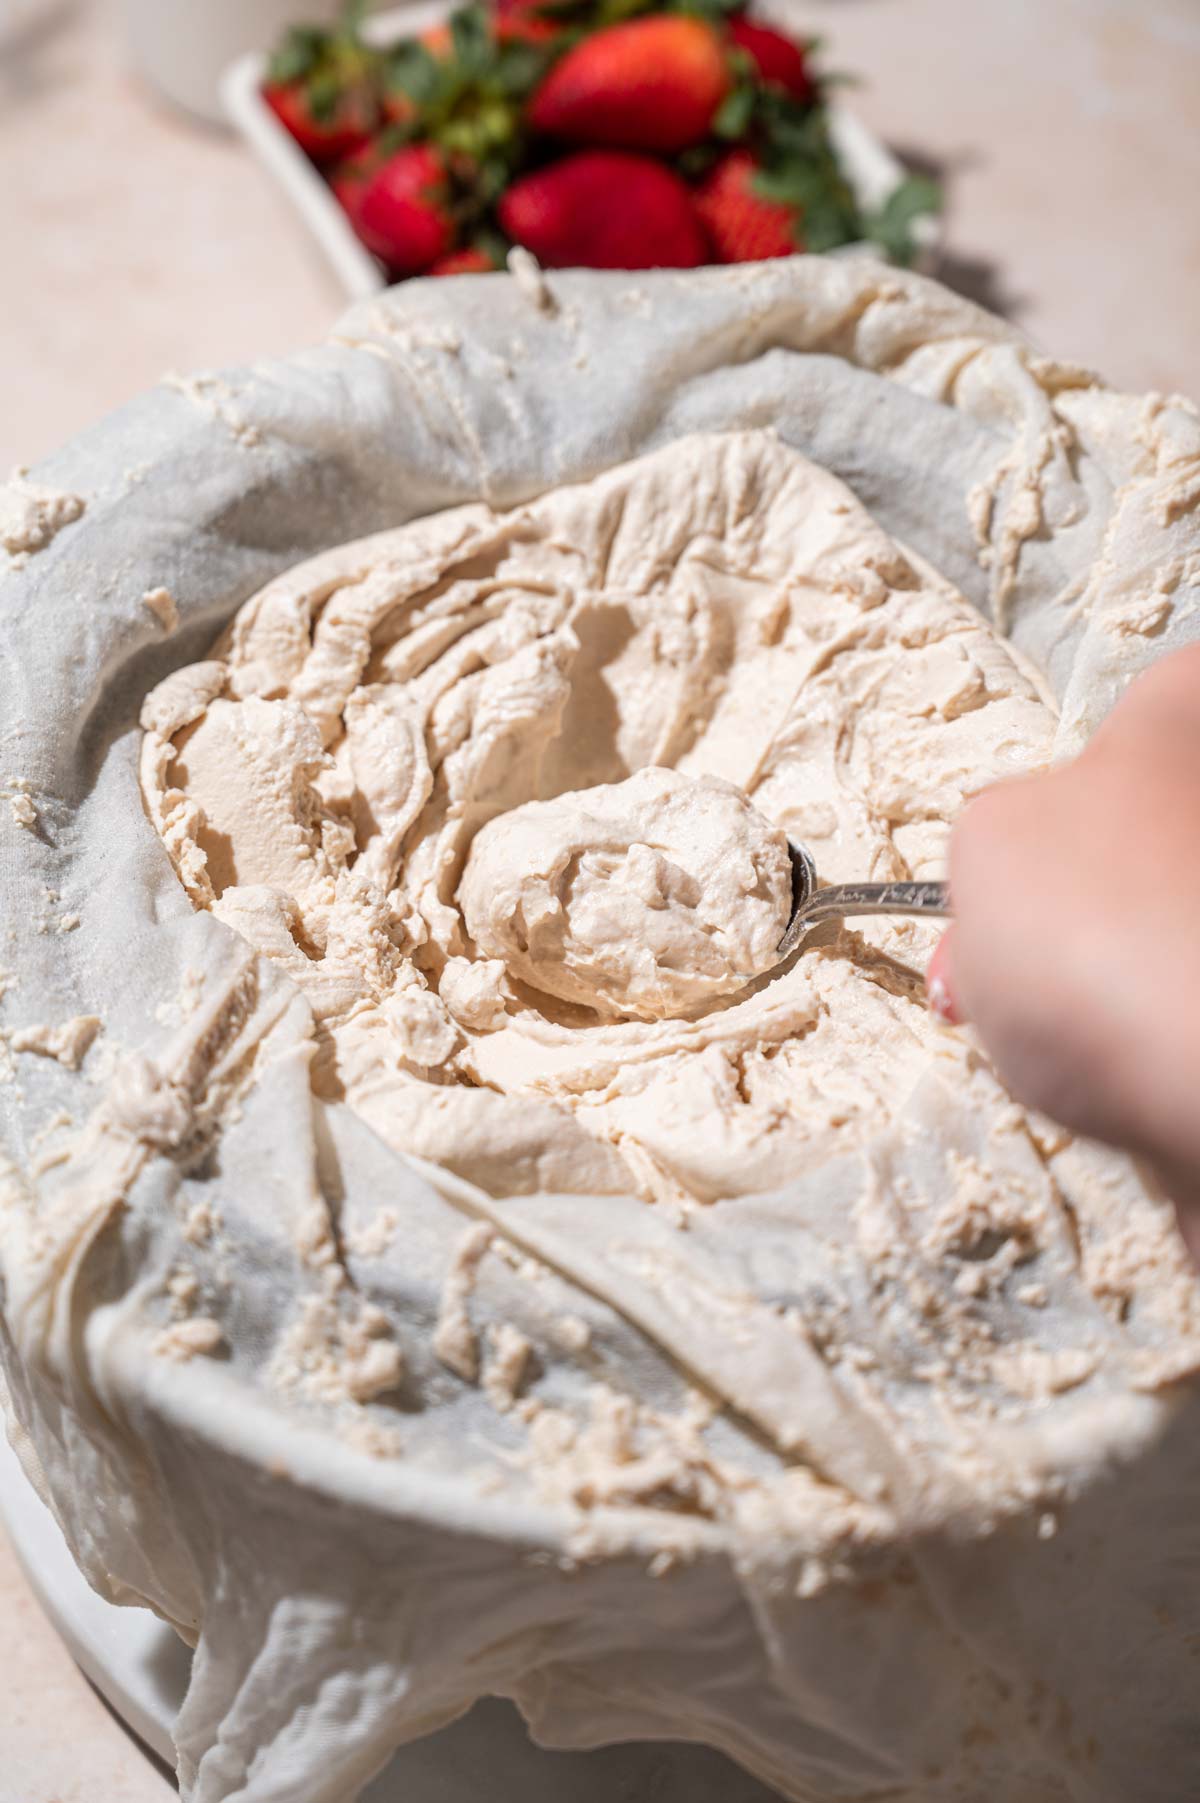
Add in Flavorings & Store
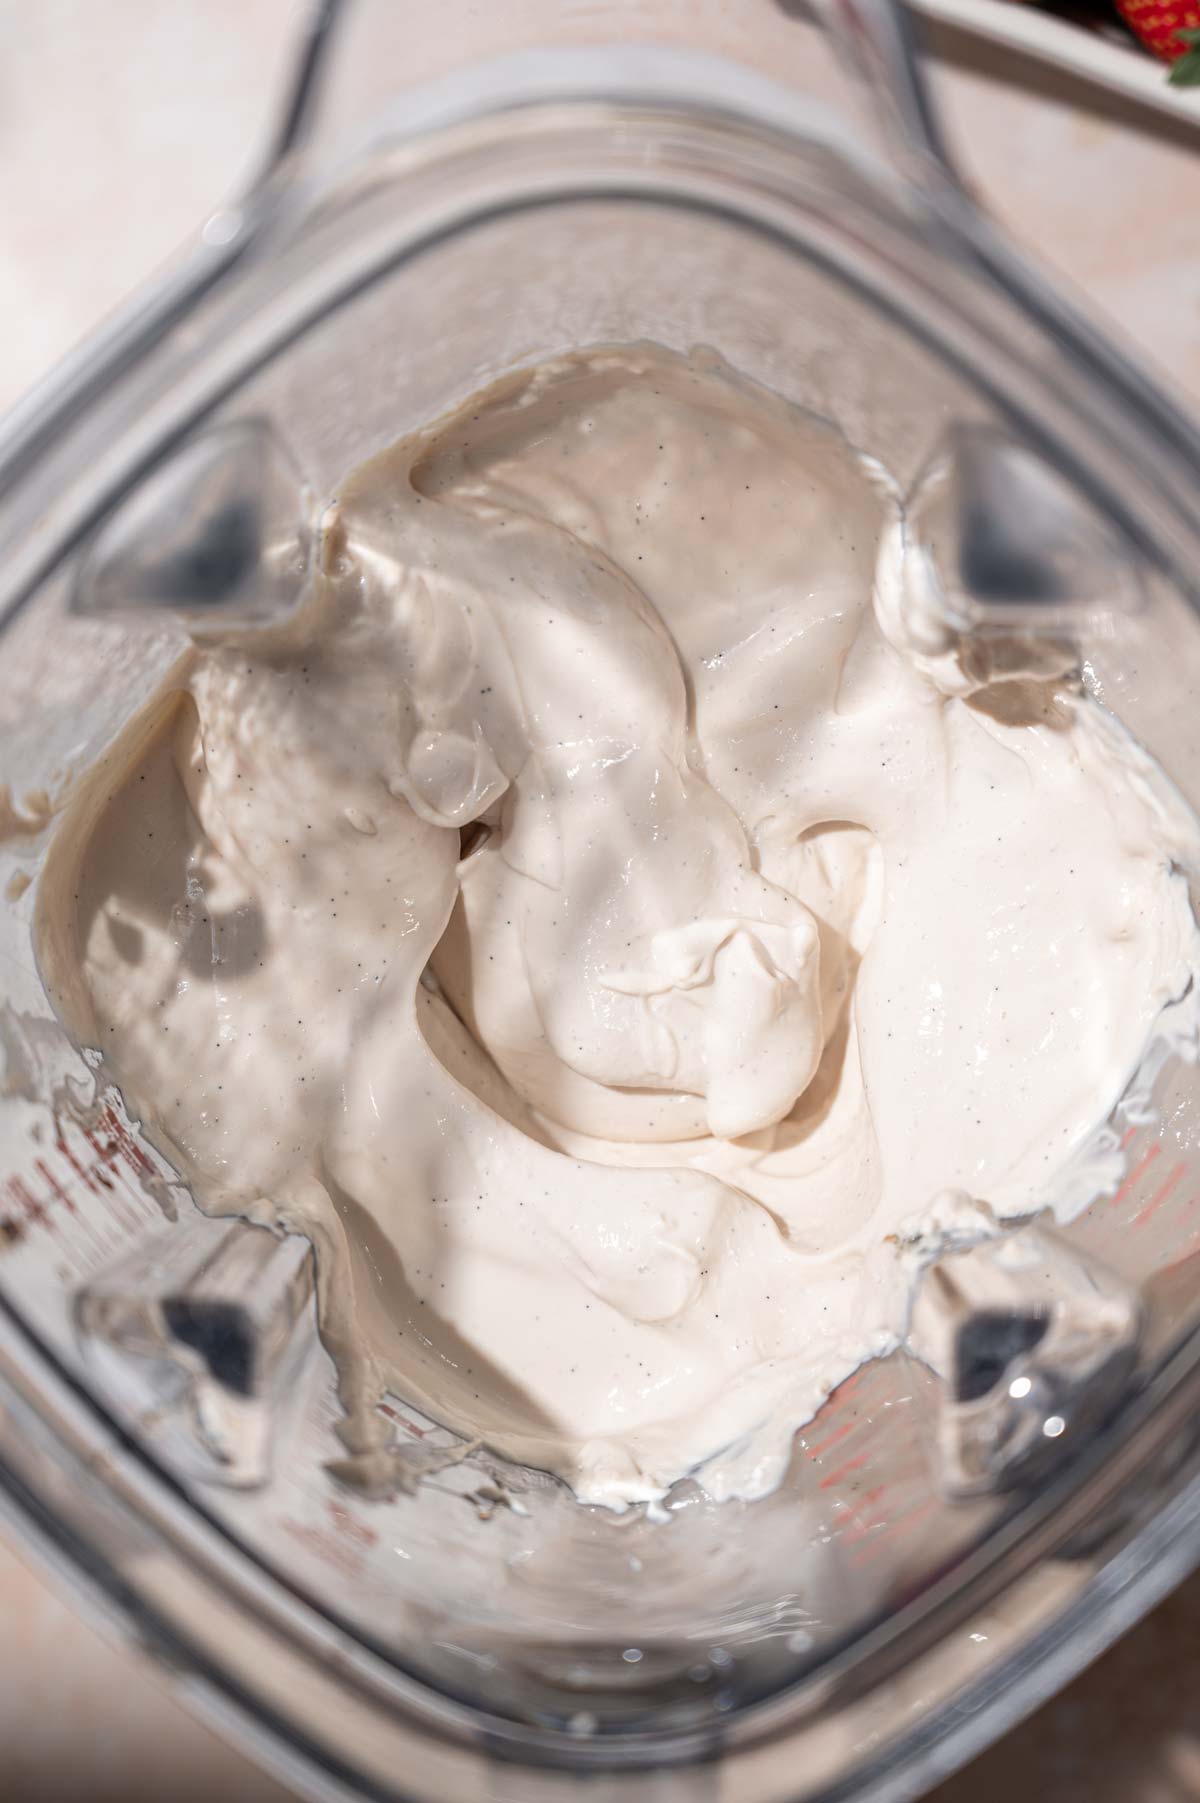
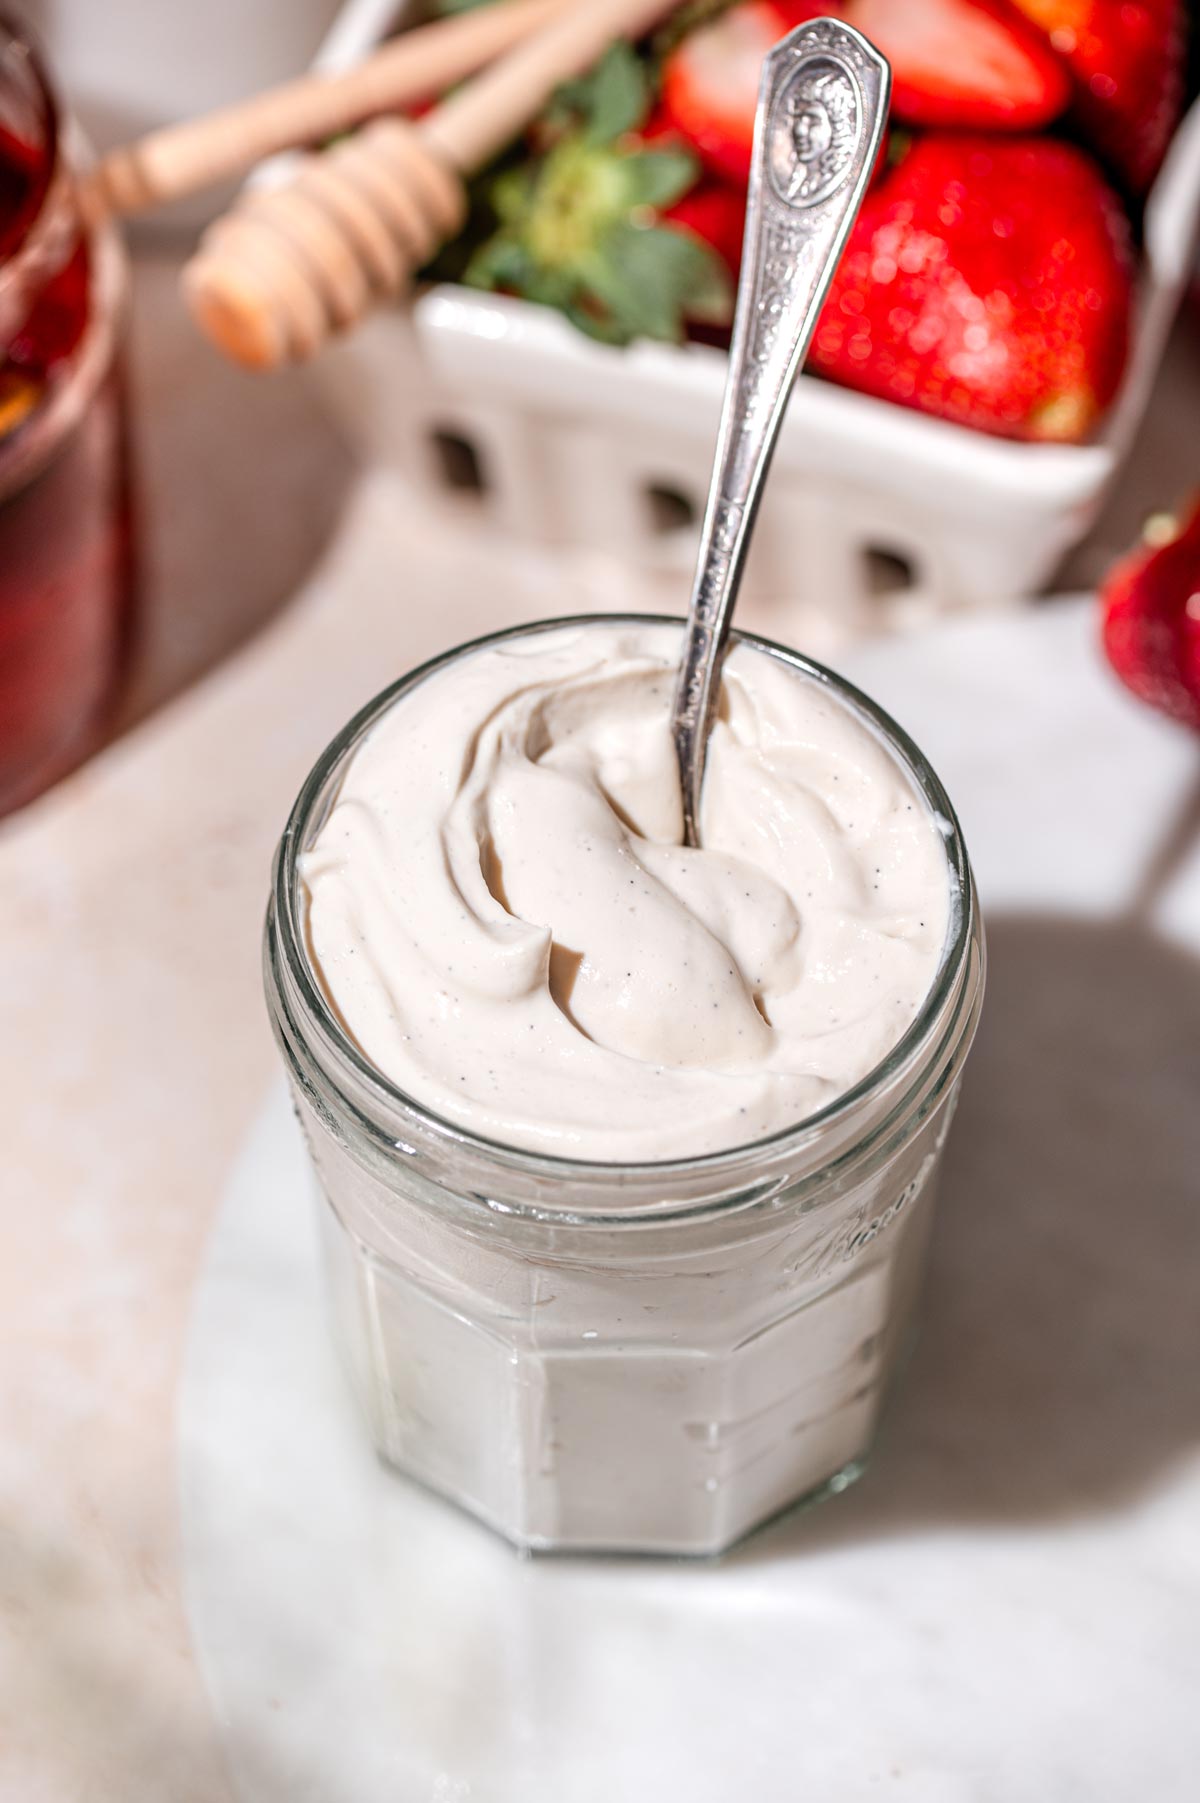
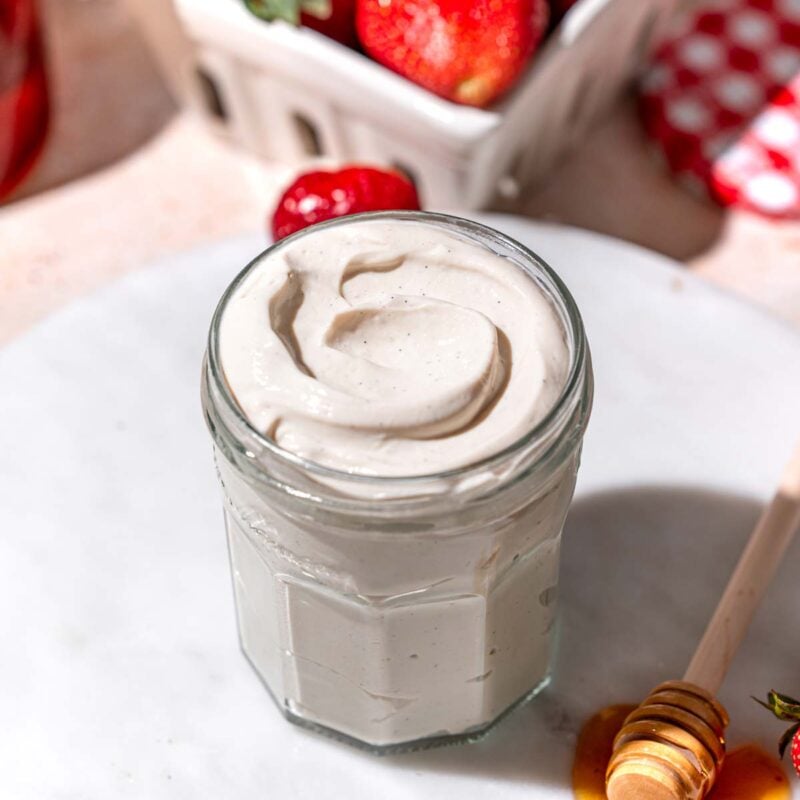
Blend or whisk in vanilla bean paste or any other flavorings you’d like. Whisking or stirring will keep the texture thicker. Blending will loosen the texture slightly.
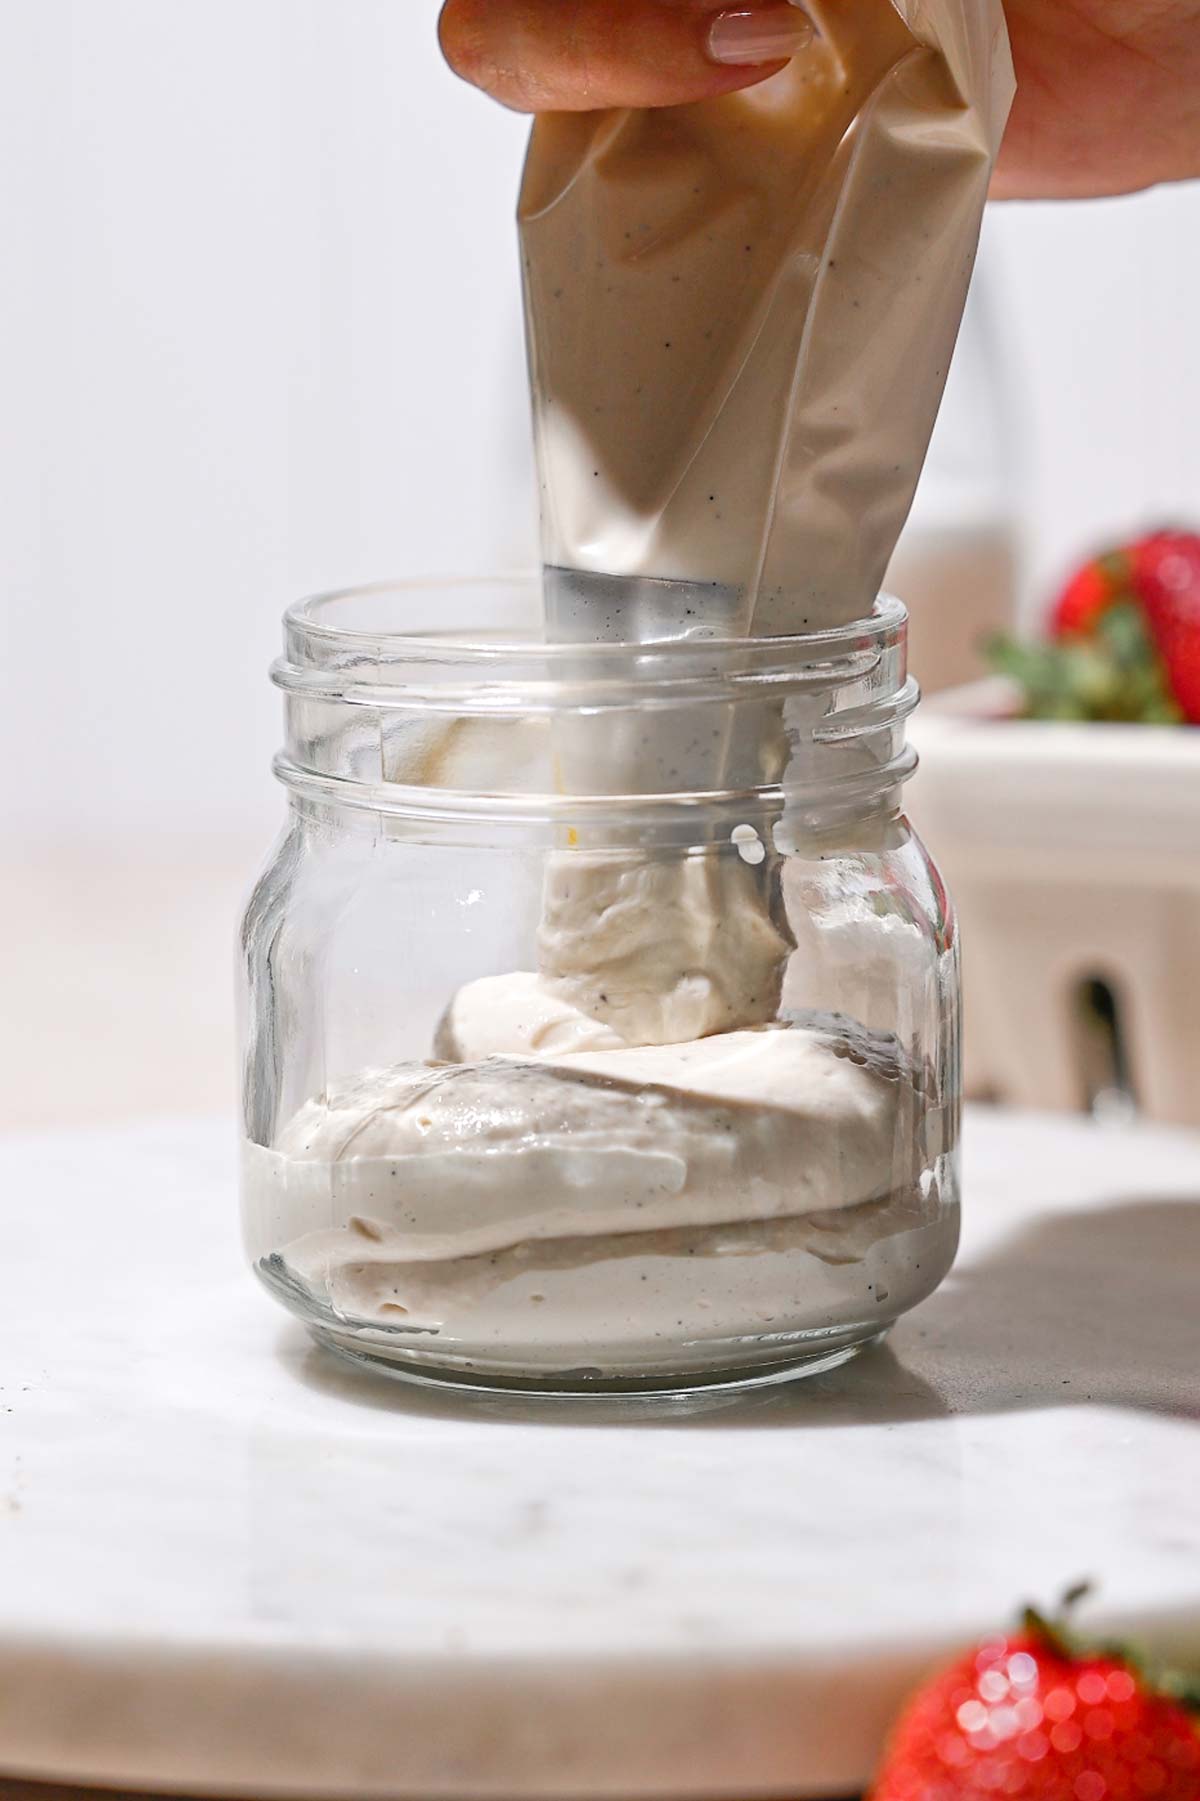
Scoop or pipe into sterilized jars and store in the fridge for up to 2 weeks.
Serving Ideas
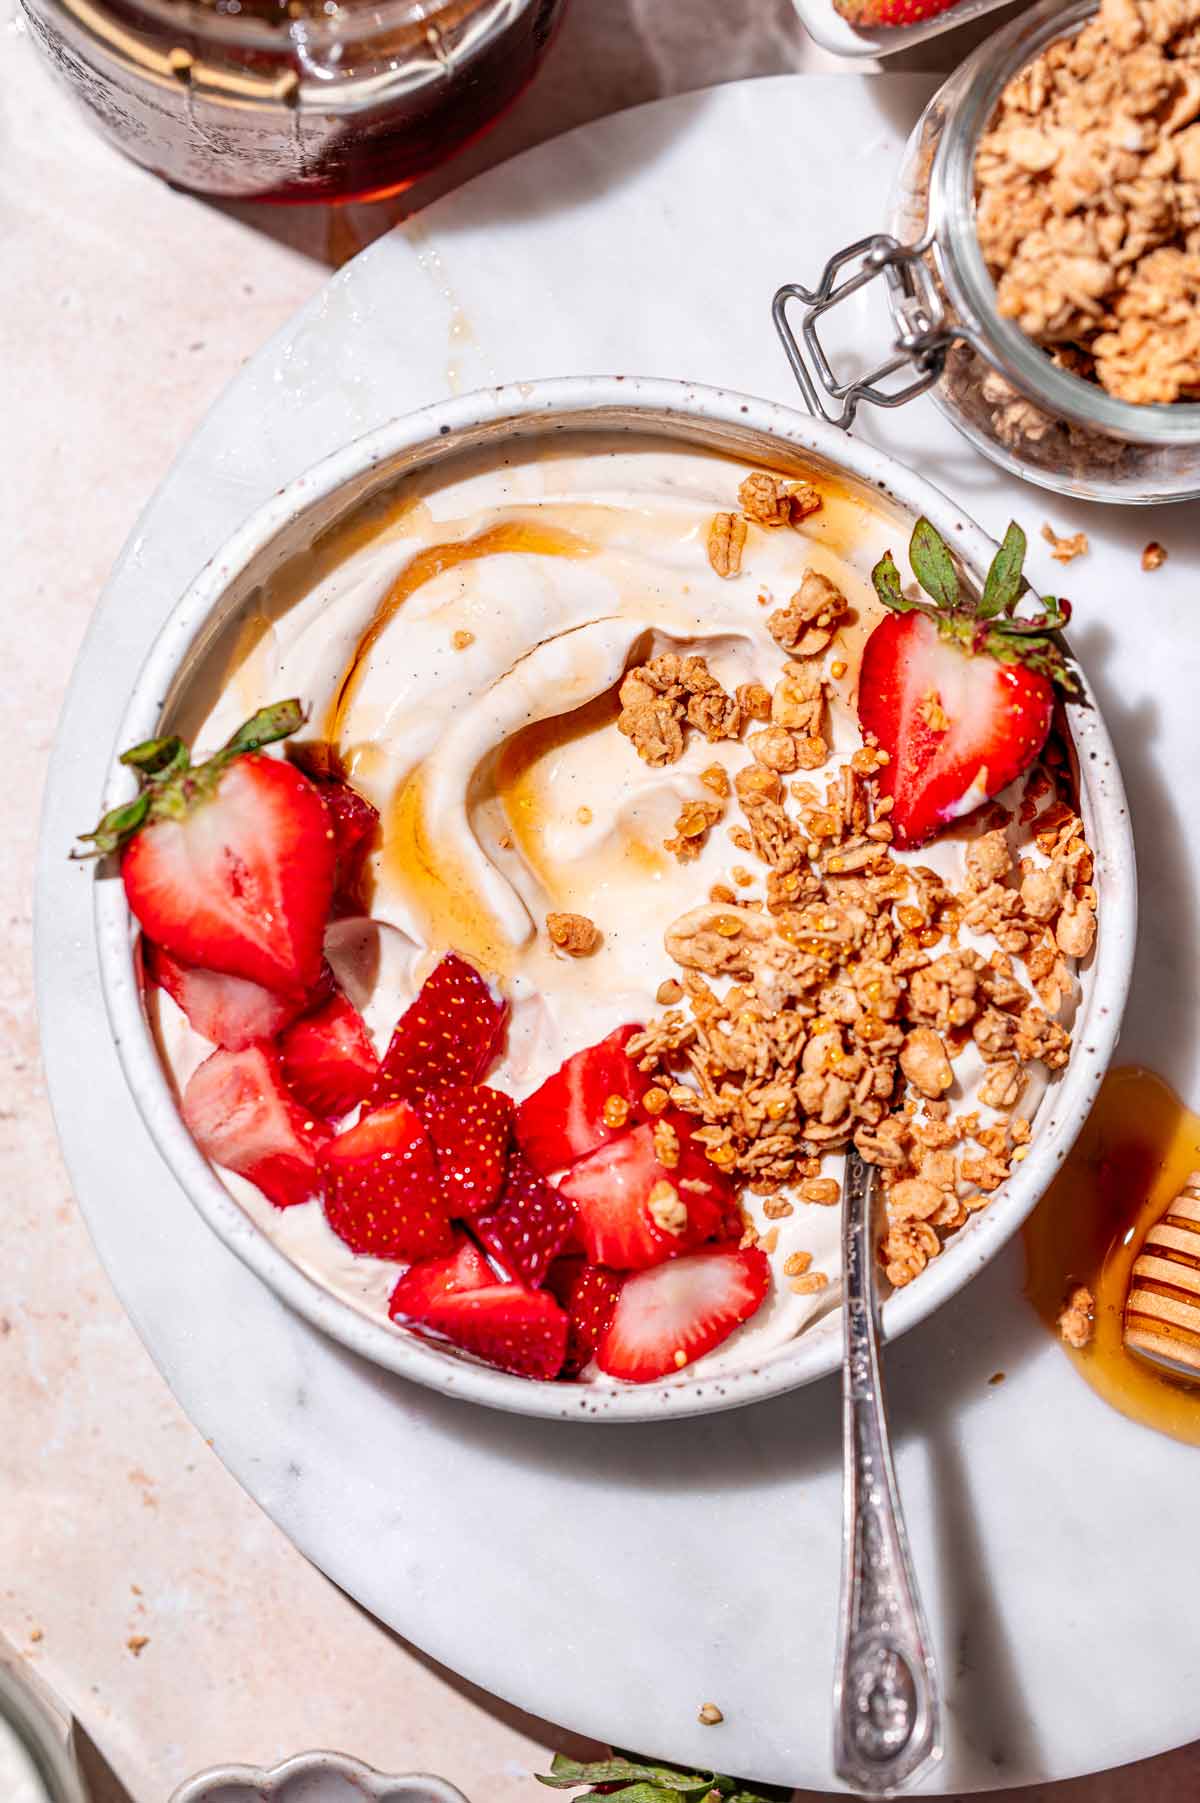
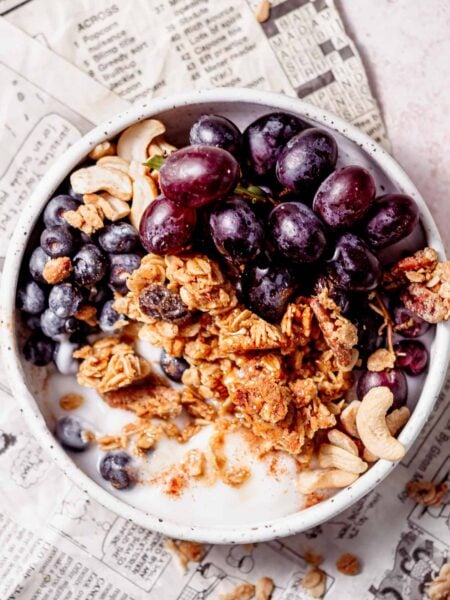
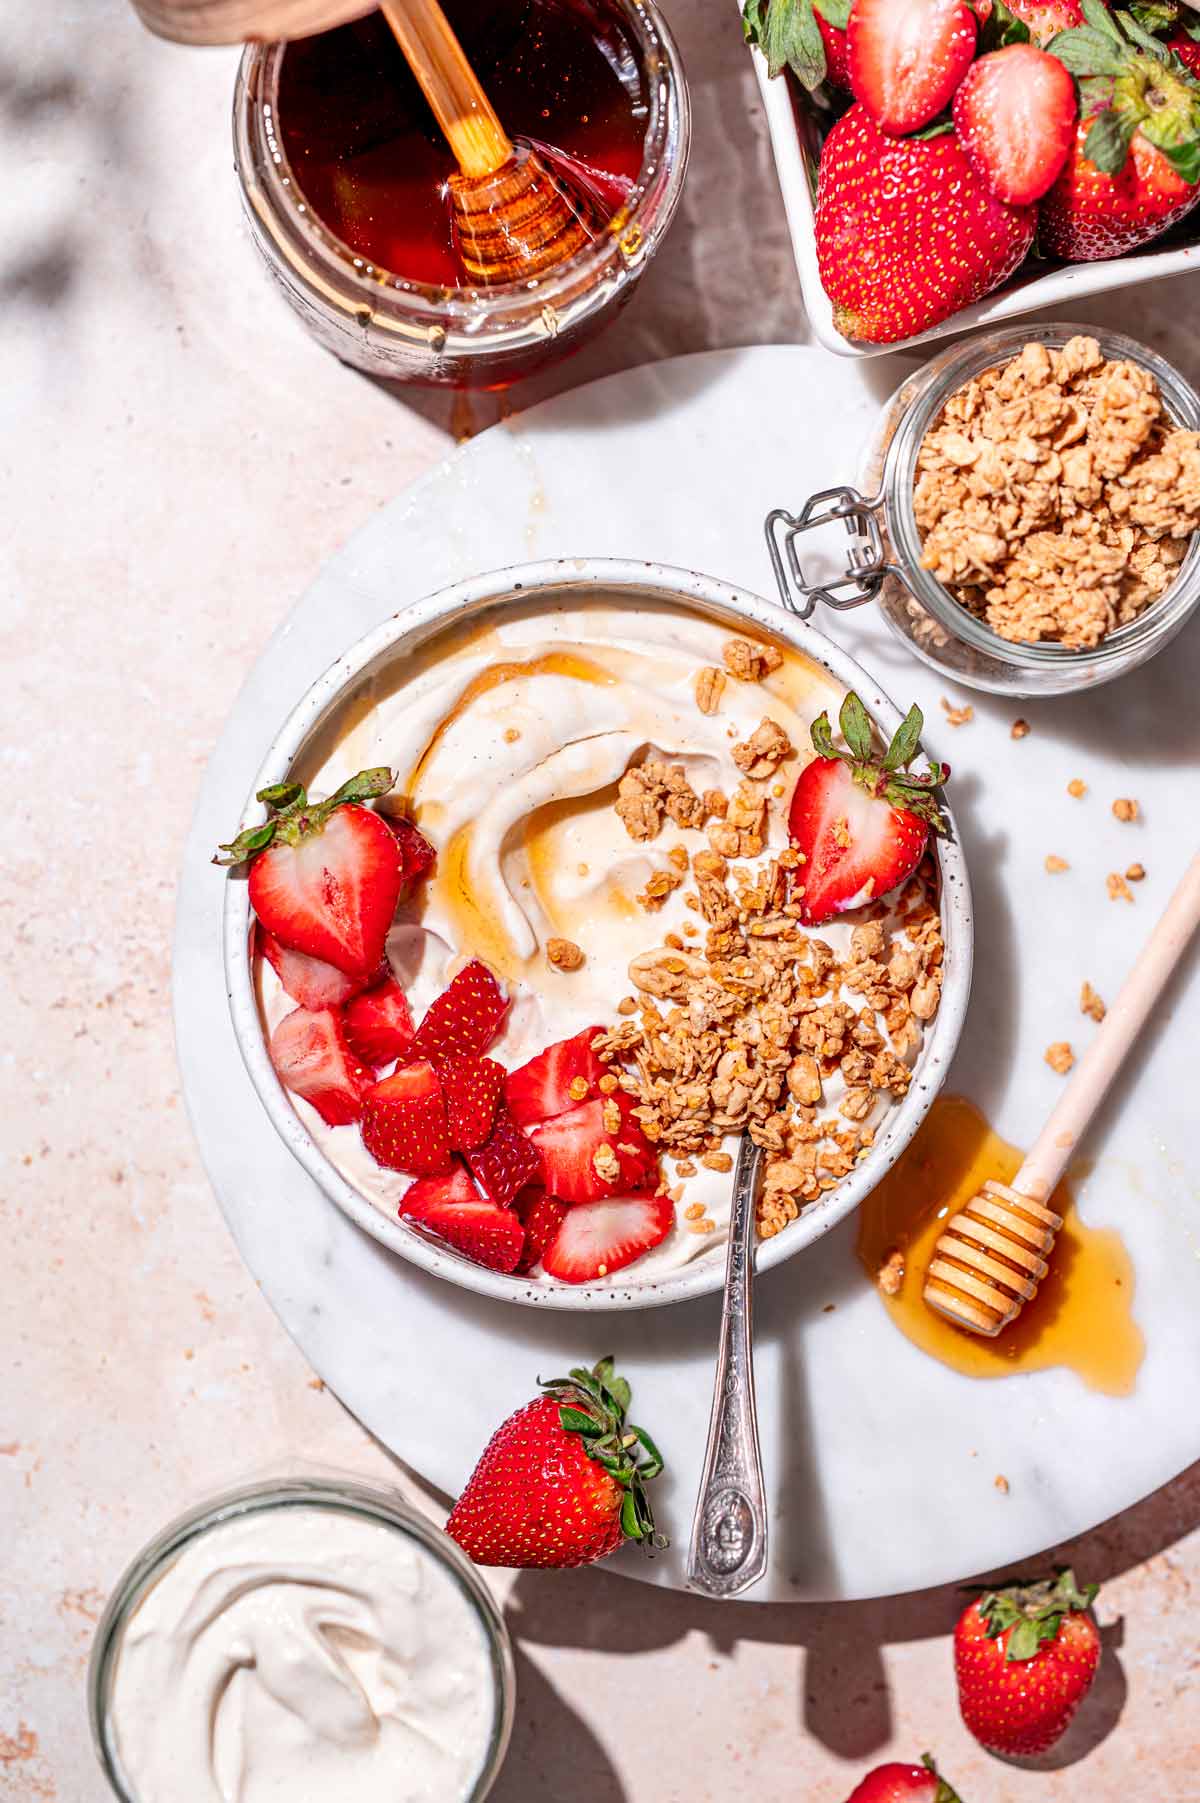
I’ve been eating this yogurt nearly every day this summer, usually for breakfast or as a post dinner snack. My favorite way to enjoy it is strained overnight for a thick, Greek-style texture, then served with granola and plenty of fresh diced strawberries.
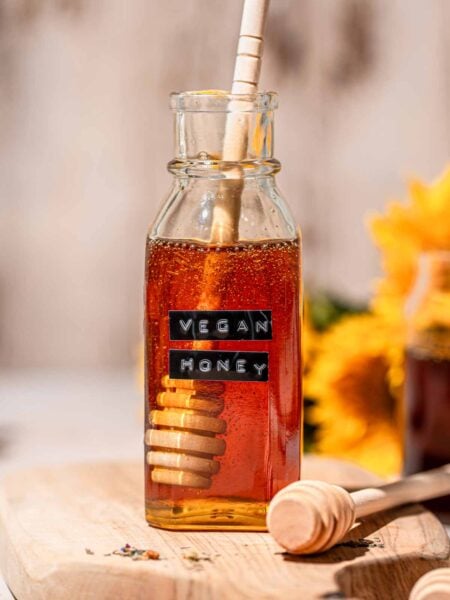
After fermenting and chilling, I like to blend in a bit of vanilla bean paste to balance the tang. For a touch of sweetness, I’ll sometimes add a drizzle of vegan honey or agave nectar (but it definitely doesn’t need it). Other toppings that work well include chia jam, chopped nuts, seeds, or a spoonful of nut butter.
This yogurt would also be so good on top of my apple cinnamon overnight oats, this vegan berry cobbler or this peach cobbler!
Tips For Homemade Vegan Yogurt
- Use a Thermometer: Some people skip it, but I’ve found a thermometer is essential for consistent results. If your milk is too cool, the cultures won’t activate. If it’s too hot (over 120°F), you risk killing the starter. I aim for 115–120°F during the first hour, then maintain 110–115°F for the remainder of the fermentation. This temperature range gives the cultures the environment they need to thrive.
- Start with Siggi’s for Best Results: After testing several options, Siggi’s Plant-Based Yogurt is by far the most reliable starter. It consistently produces thick, tangy yogurt in as little as 4 hours, with no added thickeners or powders needed. I highly recommend starting with this brand before experimenting with others.
- Strain It for Greek-Style Yogurt: If you prefer a thick, spoonable yogurt, strain your batch through a nut milk bag or cheesecloth and a fine mesh sieve for a few hours while it chills.
Frequently Asked Questions
Several factors could cause a batch of dairy-free yogurt to stay thin:
1. A weak or inactive starter (many store-bought yogurts labeled “live cultures” have few viable bacteria). The one I’ve had success with and prefer is Siggi’s Plant Based.
2. Fermentation temperature too low (under ~110 °F) or too high (over ~120 °F kills cultures).
3. For dairy-free yogurt, the milk needs sufficient protein and minimal additives or stabilizers that interfere with coagulation. See below.
Yes, using a thermometer gives you precise temperature control, crucial for consistent fermentation and food safety. This allows you to heat to 115–120 °F during the first hour, then maintain 110–115 °F for the rest of the culture time. Too cool, and the cultures won’t activate and you risk potentially harmful bacteria growth. Too hot, and you risk killing them.
These alternatives don’t work well with this method as written. Almond, oat, and coconut milk have lower protein content and often include stabilizers or thickeners that interfere with fermentation. They generally won’t set without added starches, gums, or thickening agents, and often need a different starter-to-milk ratio or fermentation process.
For thick, high-protein yogurt without additives, unsweetened soy milk with just soybeans and water (like West Life) is the most reliable option.
More Vegan Dairy Alternatives


Homemade Vegan Yogurt (High Protein!)
Rate this RecipeEquipment
- 5 qt. enamel coated Dutch oven
- Digital Thermometer highly recommended
- Oven Thermometer optional but recommended
Ingredients
- 4 cups unsweetened soy milk (West Life Soy Milk), or pea protein milk, divided- see note 1
- 1 ½ tbsp unsweetened pea protein powder, 15g – see note 2
- ¼ cup dairy-free starter yogurt (Siggi's Plant Based Yogurt), 60g – see note 3 – important!
Optional Add-Ins (after fermenting)
- 1-2 tsp vanilla bean paste
- Sweetener or fruit of choice, optional, to taste
Instructions
- Important: Before starting, be sure to follow safe fermentation practices and ensure your equipment is clean and temperatures are accurate. See Notes.
Heat the Soy Milk & Let it Cool
- Blend or whisk 1 cup of soy milk with the pea protein powder in a bowl. Let the mixture sit for 5 to 10 minutes to hydrate the protein, then whisk again until smooth.4 cups unsweetened soy milk (West Life Soy Milk), 1 ½ tbsp unsweetened pea protein powder
- Pour the hydrated mixture into a 5-quart Dutch oven along with the remaining 3 cups of soy milk. Set the pot over medium-low heat and gently warm the mixture to 180–195°F. Avoid letting it boil. Hold the temperature for a few minutes, then remove the pot from heat.
- Let the mixture cool to approximately 120°F. If a skin forms on top, remove and discard it.
- While the milk cools, preheat your oven by turning on the “Keep Warm” function for about 5 minutes. Then turn it off. The goal is to bring the oven cavity to around 120-125°F.
Add the Dairy-Free Yogurt Starter & Ferment
- In a small bowl, whisk together 1 cup of the cooled soy milk mixture with ¼ cup of room temperature yogurt starter (such as Siggi’s Plant-Based Yogurt).¼ cup dairy-free starter yogurt (Siggi's Plant Based Yogurt)
- Add the starter mixture back into the remaining cooled milk in the Dutch oven. Mix well to combine. The mixture should now be around 115–120°F.
- Cover the Dutch oven with its lid and place it into the pre-warmed oven. Make sure the “Keep Warm” function is turned off and the oven light is on to maintain warmth.
- Let the yogurt culture for 4 to 6 hours. For the first hour, aim to keep the temperature between 115–120°F. After that, it should stay between 108–115°F. Check periodically. If the temperature drops too low, briefly turn on the “Keep Warm” setting for 3 to 5 minutes, then turn it off again. Do not leave it on continuously, as high heat can kill the cultures.
Strain the Vegan Yogurt and Chill
- Once fermentation is complete, optionally strain the yogurt for a thicker, Greek-style consistency. Line a sieve with cheesecloth and place it over a bowl. Transfer the yogurt to the sieve and strain in the fridge for at least 30 minutes or overnight.
- After straining, whisk or blend in vanilla bean paste or other flavorings of your choice. Whisking preserves a thicker texture, while blending will make it slightly looser.1-2 tsp vanilla bean paste, Sweetener or fruit of choice
- Scoop or pipe the finished yogurt into sterilized jars. Store in the fridge for up to 2 weeks. Makes roughly a 450-500 gram batch.→ Once you make your first batch, be sure to reserve ~½ cup to use as the starter for future batches. This is enough for 8 cups of milk (or a double batch). Use the starter within 5-7 days.
Video
Recipe notes
Did You Make This?
Leave a star rating and a comment below to let others know how it turned out for you!


Hi have you tried any other pea protein or protein powders? I was wondering if the Orgain unsweetened would work or if you think it would give it a nasty flavor. Looking forward to making this!!!
Hi Netty! I’ve only tested this recipe with plain pea protein, so that’s the one I can recommend with confidence. Orgain unsweetened might work if it doesn’t have too many extra additives, but I’d be a little cautious since some blends can give off-flavors during fermentation. If you’d like to experiment, I’d suggest starting with half the amount of protein powder, or making your first batch with just soy milk to get a feel for the process. That way you’ll have a solid baseline before playing around with other powders. Excited for you to give it a try!
I followed these directions exactly as far as I know but after 5 hours of fermenting in the oven it is pure liquid. Not thick at all! What did I do wrong? :/
Hi McKayla, it sounds like the issue was most likely the starter yogurt. Some brands just don’t have enough active cultures to thicken within 5 hours. Which brand did you use, and what type of milk? In my tests, Siggi’s Plant-Based and Silk Greek-Style were the only ones that thickened within 4–6 hours — others sometimes needed up to 12 hours to set.
Dare I say life changing?!
I made two changes, 1. omitting the protein powder because a lot of brands are high in lead 2. Using a stainless steel pot opposed to Dutch oven bc it’s what I have. I did double the recipe as well.
So went with just the organic soymilk & siggis yogurt and it still worked exactly as you instructed! It yielded a thick, creamy yogurt. And thickened in the same amount of time as you stated. This recipe will be added to my weekly food prep. Thanks for sharing this!! No more $60+ per month on yogurt for my family.
Hi Myana! So glad it worked well for you. I’ve also made it without the protein powder and it always thickens up great. Love hearing it’ll help save your family some yogurt money each month.
I use a probiotic capsule in my homemade vegan yogurt and then strain it. Can I still do that with protein powder added? And would using the probiotic capsule instead of a starter yogurt effect the protein in my finished product? Thank you.
Hi Mary, you should still be able to use a probiotic capsule with this recipe. However, the time needed for the yogurt to set may differ/take longer). The finished product may have 1-2 grams less protein than if you used a dairy-free yogurt like Siggis.
Hello I am going to try this recipe when I get some pea protein. I’m struggling with getting enough protein. Do you think the yogurt setting on my instant pot would work?
Hi Robin, the Instant Pot should work just fine (using the yogurt setting). However, I haven’t tested it with this recipe so I can’t suggest exact times.
Thank you for such detailed instructions and ideas!! I live in SE Asia and there’s not much in the way of vegan yogurt in my neighborhood, so I decided to try making soy yogurt. I used a ‘high protein’ soy milk and probiotic capsules. I don’t have an oven so I made sort of a double boiler in the rice cooker, just putting the glass jar right in the rice pot with a couple inches of water and leaving it on the ‘keep warm’ setting, and leaving the thermometer right in it. Sometimes the temp dropped too much, so I’d just turn on the ‘cook’ setting to warm it up a bit. I had to try 2 different types of probiotic capsules – the first ones I used, nothing happened. I put the milk in the fridge and tried again the next day with a different brand of probiotics and it worked! It set in a few hours and it’s super creamy and really tasty.
Does this recipe work following Dr. Davis’s 36 hour recipe in an Instant Pot?
Thank you.
Hi Mary Ellen, I’m not familiar with this recipe, so I can’t guarantee how it will turn out.
This recipe is amazing! After a number of not-great attempts at DIY vegan yogurt, your recipe has made it easy to make my own. I sometimes add 1-2 Tbsp of powdered coconut milk or about a cup of cashew cream before pasteurizing for added creaminess with good results, too. Using the homemade yogurt as a starter, each batch is yummier than the last. Delicious!!